Showing posts with label China Glaze. Show all posts

Friday, May 30, 2014

The Amazing Spider-Manicure!

Nail Art

   Oh, readers, this post is a fun one for me to share!  You may think that with all the pastel colors around here that I am simply a girly-girl.  Not true!  Beneath my frilly, lacy outer layer you will find a cold, hard nerdy comic book geek.  Hey, sometimes your knight in shining armor is actually a knight in really tight spandex.  Don't complain, fellow princesses, you know a spandex spidey-suit is easier to clean than a full suit of armor.  Yay for wash-and-wear!  ...Moving on!


   See what I did here, channeling the vintage comic book cover style?  I'm pretty proud of it... not nearly as proud as I am of these nails, though!!  I painted them on May 3rd, in preparation of my my 2nd wedding anniversary day-early dinner & movie celebration.  (What a mouthful.)  See, I really am a geek - I totally felt this was a sufficient romantic date for an important occasion.

   So yes, this was nail art for The Amazing Spider-Man 2 movie - wait 'til you see the other hand! - but  promise that I will reveal no spoilers.  I hate spoilers!


Monday, December 16, 2013

ILNP: My Private Rainbow (Scattered) over China Glaze: Recycle

Swatch & Review


   Hello, princesses!  Are you curious about the I Love Nail Polish scattered-holographic effect topper?  I was, so I bought it and tried it over China Glaze Recycle (which is a perfect grey creme that I should have owned sooner, I used 2 coats).  My Private Rainbow (S) is a subtle rainbow-sparkling polish.  My camera muted the effect, which is a bit stronger than in my photo, but it certainly isn't anything linear.  It's like China Glaze Fairy Dust's even daintier sister.  I really enjoyed wearing it, and can't wait to see what it looks like over more... shall I say colorful? polishes.  What do you think of it?

Friday, November 22, 2013

Nfu-Oh #62 and China Glaze: Hello Gorgeous!

Swatch & Review


   Sunlight picture, yay!  I've already shared Nfu-Oh #62 before on my blog, but I've had these polishes for so long that my nails and photography skills have improved to the point that I really ought to reswatch them all!  Anyway, #62 is the linear holographic polish.  It takes 2 coats.

   China Glaze Hello Gorgeous! can be built up into a textured glitter polish because the soft pink glitter nicely hides any bare patches!  I used 3 coats by itself (no topcoat, no "underwear") for a look very similar to what I did with China Glaze Glistening Snow.  Next time I wear this I'll try it as a single-coat topper over a dark color.

Wednesday, November 20, 2013

I♥NP: Cheshire Blues over China Glaze: Electric Beat

Swatch & Review


   Here's a really great glitter topper from I♥NP!  It's called Cheshire Blues, and it contains pale blue, periwinkle, white and pink glitters.  I was really impressed with this one, because I only used 1 coat on my middle nails and I did not have to fish for glitter!  I was totally surprised when my brush grabbed those 3 heart glitters!  China Glaze Electric Beat impressed me, too.  Perfect shade of blue and a wonderful formula.  Two nails took 2 coats and the others only needed 1!  These polishes are both from older releases but fortunately still available - do you have either of them?

   Also, my blog is getting an overhaul!  I'm doing all the work myself so please tell me if you spot anything that isn't right.  What do you think of it?  =)

Monday, November 18, 2013

L'oréal: Drop Dead Gorgeous, The Bigger The Better, & China Glaze: Fade Into Hue

Swatch & Review


   Still plowing through nail pictures taken before Freya was born, here is a manicure that nicely used 3 untried polishes.  The blue creme on my center fingers is China Glaze Fade Into Hue, a perfect periwinkle tone.  Love it!  The glitter over it is the same sauce in the bottle I'm holding; L'oréal The Bigger The Better.  In the bottle it looks uninteresting but it turned out to be black and silver tiny & micro glitter in a clear base.  The coverage was great - my swatch shows 1 coat.  And the outermost black nails are L'oréal Drop Dead Gorgeous, a black polish filled with silvery-white flecks.  In the bottle it looked like these might have some iridescence but it was lost on the nail.  Still, the coverage was great, so I'll keep it for my stash of black-with-something-extra polishes, since I love those entirely too much.  ♥

Monday, November 4, 2013

Lacquerlicious: Star Attitude over China Glaze: Def Defying

Swatch & Review


   Wow, a swatch post!  It has been so long!  Today I'm sharing Laquerlicious Star Attitude - 1 coat over China Glaze Def Defying.  This is an AWESOME combination!!  Seriously, I could not get over how bright and happy my nails looked.  I used 3 coats of Def Defying, though I could have gotten away with 2 on the glitter-coated nails.  Star Attitude only needed 1 coat because it is packed with all different types of glitters... star shapes, hexes, shreds, micro bars...  Despite being so full of gllitter application was easy, so this nail polish is a winner in my opinion!  Thanks for looking.  =)

Tuesday, September 10, 2013

Laquerlicious: Melon Sorbet with Watermelon Nail Art!

Nail Art / Swatch & Review

   Good day, Princesses!  Last month when my Laquerlicous polishes arrived in the mail I was immediately inspired by this one.  It was calling out to me from the bottle and I knew I needed to use it in a melon-y manicure ASAP.  I wanted to make the glitters pop, so I couldn't do just a regular pink/red watermelon design.  I thought of trying a nice cantaloupe color, but there is a funny thing about watermelon...


   It's a fruit, it's a vegetable.  It's not technically a melon.  And when it grows without the red pigment-giving antioxidant lycopene... it comes in the most lovely shades of yellow!

Photo source: whataboutwatermelon.com

   I must admit to feeling quite clever about remembering that yellow watermelons are indeed "a thing".  You see, I've never actually found one in person.  They just aren't common in our area.  I'd love to try a slice, though!  They sound like they taste fantastic...  Anyway, nail polish, yes.


   Laquerlicious Melon Sorbet is such a fantastic glitter topper.  I mean, just look at this macro!  It is full of satin and matte shapes in happy shades of pink and green, along with a dash of black and white.  It's the perfect blend of color variety and glitter sizes, easy to work with, and has perfect topper coverage at one coat.  Each nail ends up looking totally unique (without looking chaotic) and there is no need to do glitter fishing.  Though I did fish out the pastel pink circle for my index nail - I saw it in the bottle and I wanted it!  I could go on, but that would probably be cruel.  Right now this polish is on clearance, and there aren't many bottles left.  I'll just say that if you missed this one, I feel very sorry for you.


Details on the nail art:
   Pastel yellow glitter nails: 3 coats China Glaze Lemon Fizz and 1 coat Laquerlicious Melon Sorbet.  Topped with 1 coat of Gelous and 1 coat of Poshe.  (Only used Poshe for the other nails.)
   Melon slice accent nail: Lemon Fizz base with China Glaze Happy Go Lucky sponged at the cuticle for a riper, sweeter-looking melon, black seeds using a nail art striper (L.A. Colors Black), and Zoya Purity sponged at the tip for a realistic fade into the rind..
   Melon rinds:  Base color is Zoya Hunter with squiggly lines done with a bright green nail art striper (L.A. Colors Mint Green).

   I'm a nail-art novice, so I am really happy with how these turned out!  I actually wore these nails at the end of last month; editing the pictures now and seeing them again made me happy all over again!  It's only summer for another week, so it was a perfect time to get my melon on.  Haha.


   If you'd like to see more about yellow watermelon, check out this article on wiseGEEK and this recipe for, what else?  Yellow watermelon sorbet!  Also, if you've ever had the chance to eat yellow watermelon please leave a comment telling me about your experience!  Until I find it myself I'll have to live vicariously through others.  =)


   This might be my last blog post for a little while.  My previous OB appointment revealed that I can basically go into labor at any time (Yay!  ...I think?), and if I don't by this weekend I'll probably be induced (having issues with low fluids again, thus the constant monitoring).  In fact, as this post is going live I'm heading off to one more appointment, where I guess they could say "we're keeping you now".  But I'm hoping that doesn't happen...  Either way, I don't know that I will have much of a brain for blogging.  Most of my time off this week has been spent cleaning, packing, and napping.  ^-^  Until we see you again, hugs and kicks-es from the baby and I! ♥

Saturday, August 31, 2013

August 2013 Hauls

   Things are looking up!  My last doctor visit went well and my fluid levels are where they are supposed to be.  So long as this continues I should be able to safely carry this baby to term!  As of today that only makes 3 weeks to go, anyhow...  I'm fine with her waiting until then to come out, haha.  =)

   So, this month... kind of made up for buying so little earlier in the year...  Some things were gifts though, too!  And pretty much everything else in this picture was on sale.


   Usually I would have a bunch of pictures and list off everything that I accumulated, but I'm not doing that this time.  (Combine a busy week & weekend with the exhaustion of pregnancy...)  Instead I'll leave links to what I've already shown on my blog!
   I've already tested more of what you see here... tune in next week for Nyx swatches and more Laquerlicious eye candy!  I think I want to try out the nail decals or foil sheets I found next...

Monday, August 12, 2013

Lush Lacquer: Pebbles with Fishtail Accent - Baby Shower Nails!

Nail Art / Swatch & Review

   Working through more of my untried indie glitters, I created this cute manicure to wear to the baby shower that my best friend held yesterday!  It was such a nice party.  These might not look like very baby-themed nails, but I'm not one for baby motifs.  So I went with nice bright colors, instead.  Also, Lush Lacquer is created by a mother-daughter team, so it totally fits!


   All my nails started out with a base coat of white, which was Zoya Purity.  For my glitter gradient nails I used Lush Lacquer Pebbles.  This is an awesome, colorful matte glitter in a clear base.  It looks way better on the nail than in the bottle, where the colors appear muddled because of the tiny glitter size.  On the nail the yellow, pink, purple and blue really pop!


   The glitter coverage was good, too.  My nails are showing 1 coat at the cuticle/top, 2 coats from the middle down, and 3 at the very tip.  Roughly.  I just dabbed the glitter on carefully to make the gradient effect.  My verdict is that this polish is great!

   For accent nails I tried doing fishtail style chevrons for the first time.  They didn't come out too badly, but 4 colors was way too many for a beginner's attempt!  Definitely going to stick with 2 the next time I practice.  I did a pretty good job matching up the polish colors to the glitter in Pebbles, though.  Here is what I used:

Lush Lacquer Pebbles, China Glaze Happy-Go-Lucky, Zoya Sweet, Pure Ice Fairy Godmother and Sally Hansen Blue Me Away!

   What do you think of these nails?  Do you have any Lush Lacquer colors to recommend?  They can be found in the Lush Lacquer etsy shop!  Thanks for looking.  =)

Monday, July 1, 2013

Tutorial: Gumball Machine Nail Art


   Hello, dear readers!  I'm so excited to share this post with you!  Not only am I sharing some cute original nail art I did, I'm teaching you how to do it with a tutorial!  This is my first time creating a how-to collage (it took some trial and error), so please give me your feedback!  First off, some information about the polishes I used.

For the gumballs: 
China Glaze Happy-Go-Lucky, Grape Pop, Four Leaf Clover, Suger High; Sally Hansen Sun Kissed and Zoya Breezi

For the gumball machines: 
Zoya Elisa and Pure Ice Silver Mercedes

   Obviously gumballs and their dispensers have a lot of room for creativity with colors, and you could pick pretty much anything you want.  I wanted something easily recognizable so I reached for the classic candy and dispenser colors.  This design works really well on squared nails, and takes advantage of your natural nail shape to create the glass dome of the gumball machine.  All you need are your nail polishes, some dotting tools, and french tip guides.  On to the tutorial!


   Yay, it's easy!  And fun - I had a blast wearing this manicure.  All kinds of people wanted to check these colorful nails out, and they could tell what they were!  To me, that's nail art success.  What do you think?  If you try this please leave a link in the comments below so I can check it out!  =)

Friday, May 24, 2013

Pastel Flowery Water Marble & Glitter Nail!

Nail Art

   Quite often when I do nail art my hands don't match.  Partly from "creativity", partly from getting to experiment more per manicure!  So after finishing my right hand in a rainbow gradient I decided to use a mix of all those colors for my left hand.  In case you missed all the water marble fun in my last post, here is the right hand design:


  I'm getting a little better at making the designs and figuring out placement on my nails.  I'm really happy with how my thumb turned out as I didn't think I'd get that much of the design on my nail.  =)  The colors I used were China Glaze Light As Air, Something Sweet, Peachy Keen, Lemon Fizz, Re-fresh Mint, and Bahamian Escape.  I had already painted my nails with two coats of Zoya Purity to give them a nice blank canvas, so they came out true to bottle color.

   Anyway, back to my left hand!


   It was pretty easy deciding which colors to pair up on my nails.  Index finger got the secondaries: purple, orange, green.  Middle finger had pink, yellow, and blue, though yellow and blue tried to create green.  My pinky was done in green, purple, yellow and pink.  Love it!  I was brave and tried to use all the colors on my thumb.


   All the colors are there, but sadly Bahamian Escape blurred into an odd dusty color between Lemon Fizz and Peachy Keen.  Also, a piece of fuzz stuck into my nail!  Bummer!  Six colors in one marbled nail is a bit much, four or less works better.

   As an accent nail I used my new unnamed Claire's polish over the white base.  (See swatches of the collection it came from.)  I did two coats and this ultra-cheap glitter did not disappoint!  It has a perfect rainbowy mix of colors over white.  I'll definitely be using this glitter polish again.  Anyone know of a dupe for it?


   This is my favorite water marble so far, and I really enjoyed wearing it this week!

Wednesday, May 22, 2013

Vacation's-End Water Marble Manicure Party!

   Greetings fellow Princesses!  How has your month of May been?  My husband and I are back from our travels and it has been back to "the real world" for us.  At the beginning of this week my Mom helped me arrange (or pulled me into) a really fun get-together where I was expected attempted to be a good teacher and show some friends how to water marble your nails!  I knew it was going to be fun no matter what, but I was really pleased with how everything turned out!  =)

   First off I spent time before the party practicing my marbling skills.  This was helpful because I needed to feel comfortable, and I was able to test polishes to bring with me to the party.  I tried to make many different styles of marble designs to show what a variety you can get.  Everybody got to look at these beforehand for some inspiration.


   There were six of us altogether, so I set each of us up with a dish of filtered water and the necessary tools.  I talked about the process, then had everyone stand close by as I did my first nail.  That was all it took!  Everyone rushed back to their nail stations and started doing their thing!  These were the results.  (Please keep in mind that these are candid, before-clean-up shots that I snapped in fairly poor indoor lighting!)


Miss Heather's Nails
Colors Used:  China Glaze Four Leaf Clover, Sally Hansen Mint Sorbet, and her own coral from Spoiled
   These colors really pop together!  Heather says she is inspired to let her nails grow longer to do more marbling, but in my opinion this shows how great marbling can look on short nails, too.  Lots of great swirls here!  (One of the highlights of the party was when she forgot to mask off her thumbnail and her whole thumb came out with a beautiful swirly design.  I assured her it happens to everyone eventually!  Water marbling is messy business, and when you get a lot of polish on your hand it's easiest to let the polish dry on your skin, then wash it off with soap and water.)


Grammee's Nails
Colors Used:  China Glaze Aquadelic and Sinful Colors Hazard, with China Glaze Riveting accent nails
   My grandmother is awesome.  Not one of those ladies to go get a boring manicure from a salon, she does her own nails and comes up with great layering combinations.  Now, she water marbles!  (Yes, I have had quite the influence on her.)  Her nails look great and she's definitely getting the hang of it!  I can't wait to see what she tries next.


Michelle's Nails
Colors Used: China Glaze Blue Iguana, 108 Degrees, and Senorita Bonita, also as a solid color
   My friend and fellow polisher Michelle snapped up these sparkly glass-fleck hues that look fantastic together, and especially good on her!  She did the more conservative "marbled nails as accent nails" approach, which left her with more time for clean up afterwards.  I'm inspired to try a manicure like this some time!


Mom's Nails
Colors Used:  Essie French Affair, Bachelorette Bash and Little Brown Dress
   She started off with her own Zoya colors that refused to marble on the water, so I switched her to some of my Essie polishes that would give a similar look.  (The sad truth is that not every polish works for water marbling.)  Fortunately these shades are super easy to marble with and she ended up happy!  I think we could vote her nails as Most Swirly; she went for an every-nail-unique look.


Ruth's Nails
Colors Used:  Sally Hansen Lacey Lilac, Zoya Caitlin and her own Wet 'n Wild dark purple
   Ruth got away before I could take a pre-clean up photo.  Don't let her professional after shot fool you - she had the most polish on her hands!  ;D  But wow, this sure doesn't look like a first time water marble, either - these nails are great!  And rather than fight with marbling her thumbs she painted them solid.


   Everyone did a fantastic job, had a great time, and all agreed that they wanted to keep going after they had ran out of nails to marble.  Success!  It made me really happy to be able to do this with my friends and family.  Oh, I that's right, I did my nails, too.  By the end of the party I only had about 3 nails done on my first hand because I tried to be there to get people more supplies and advice as needed.  This was the result on my right hand:


   I was going for a marbled rainbow gradient, and I'm pleased with the effect, though I think I could have picked some better colors.  The colors, from top to bottom are China Glaze Light As Air, Something Sweet, Peachy Keen, Lemon Fizz, Re-fresh Mint and Bahamian Escape.

   I also want to take a moment to thank my Mom for hosting the party, those who supplied the tasty snacks we had, and everyone who enjoys these awesome nails!  If you haven't tried water marbling yet, do!  If you already know how, host your own party!  =)

Friday, May 3, 2013

Back From My Break... To Go On Vacation!

   Hi there, do you remember me?  Rochelle, that girl who was doing something I think we call "blogging" at the beginning of the year?  Yeah, I've been away for awhile.  I apologize for my unexplained absence, but I promise it was for good reasons!  I'm keeping this post short, but I do have some nails to share:


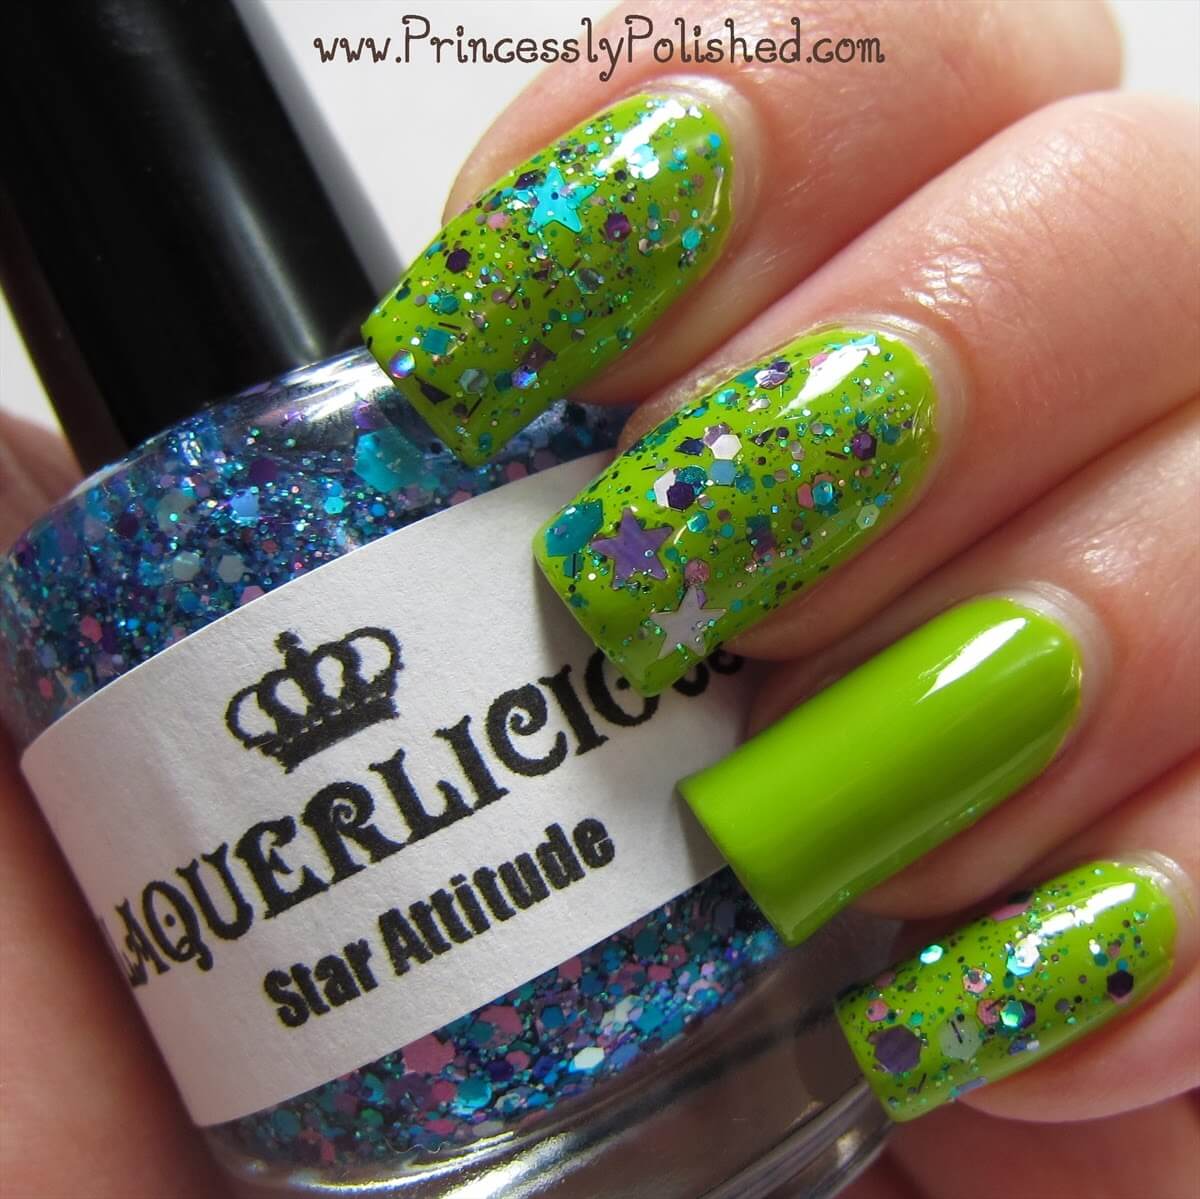
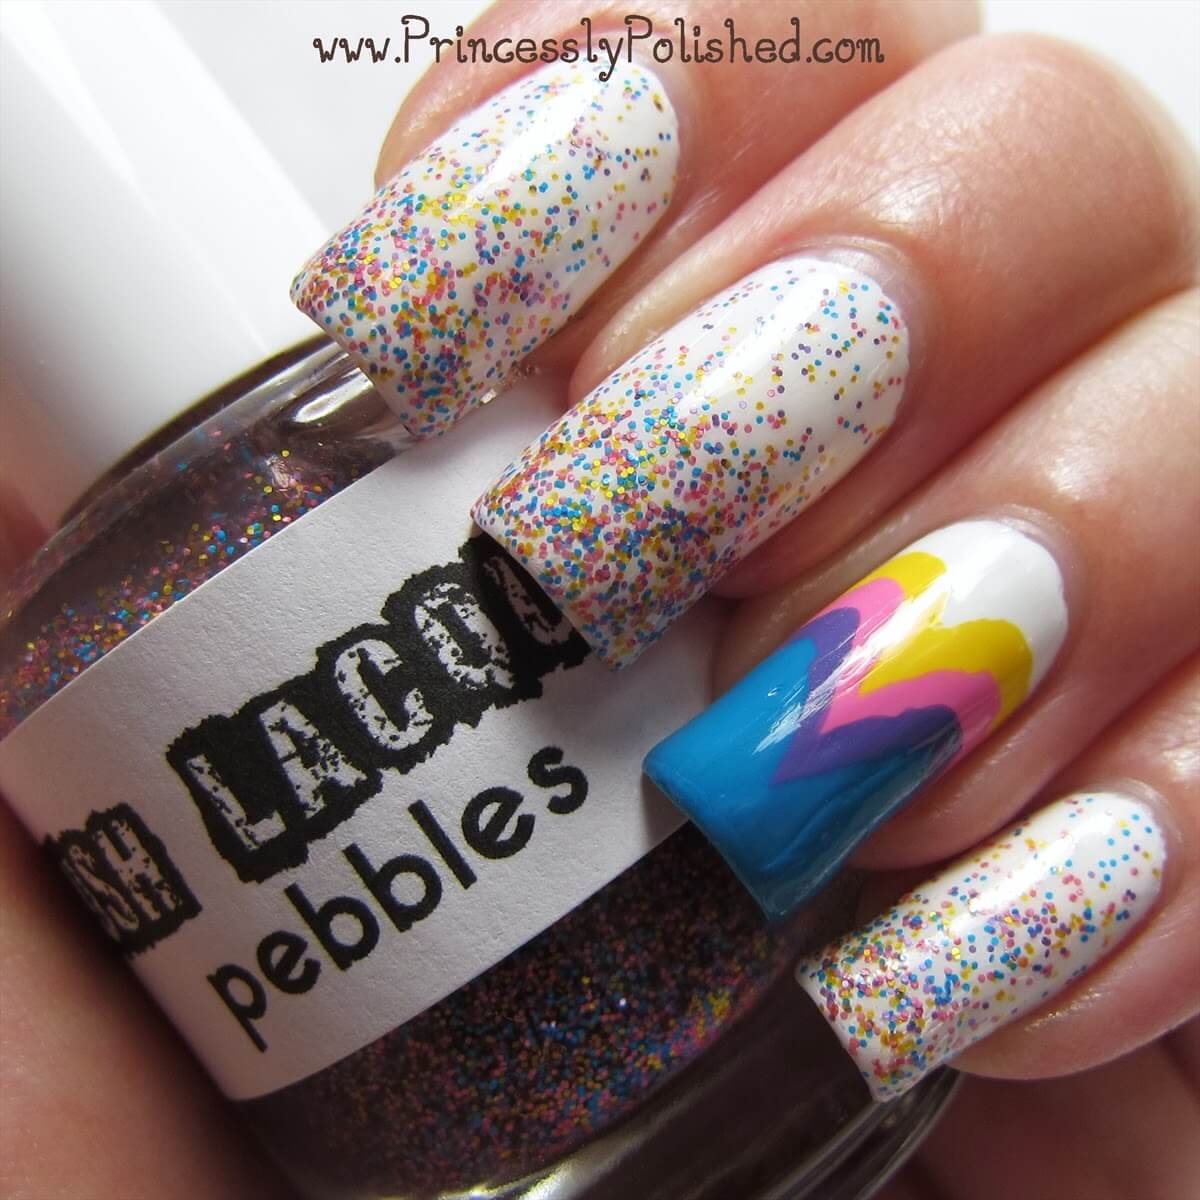
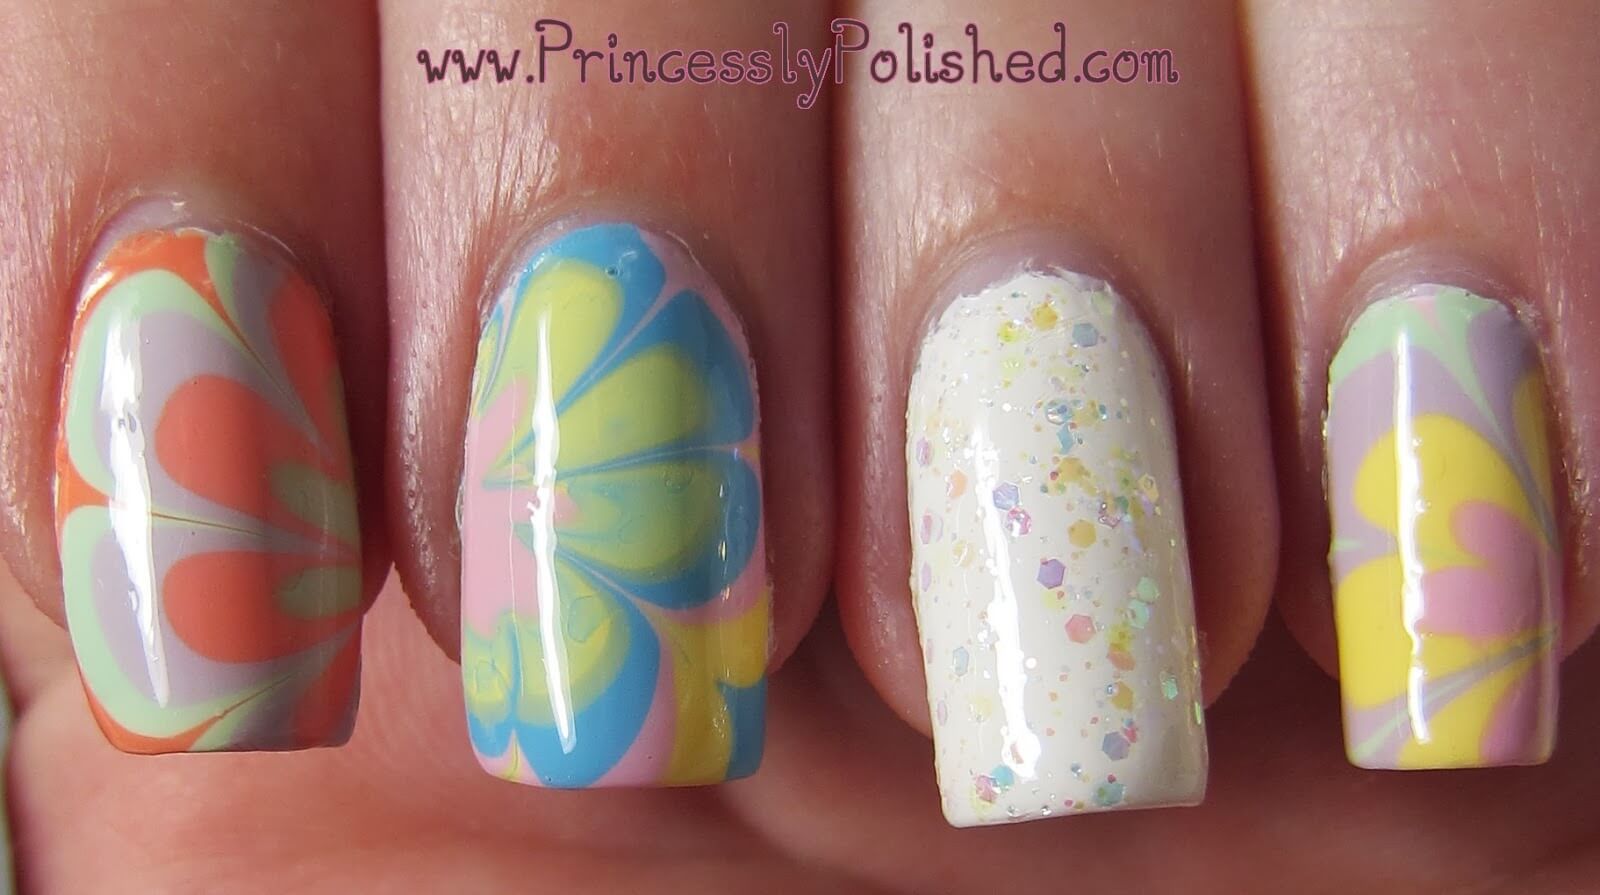
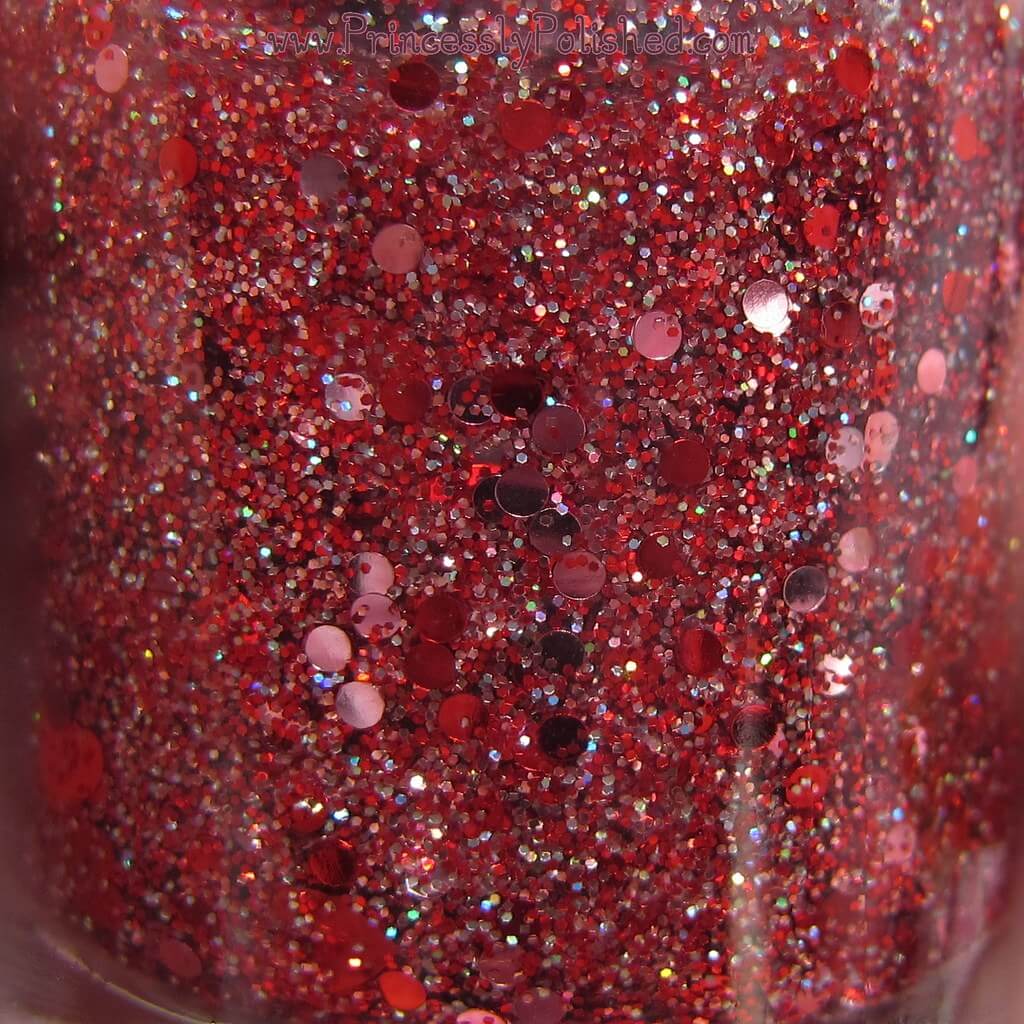
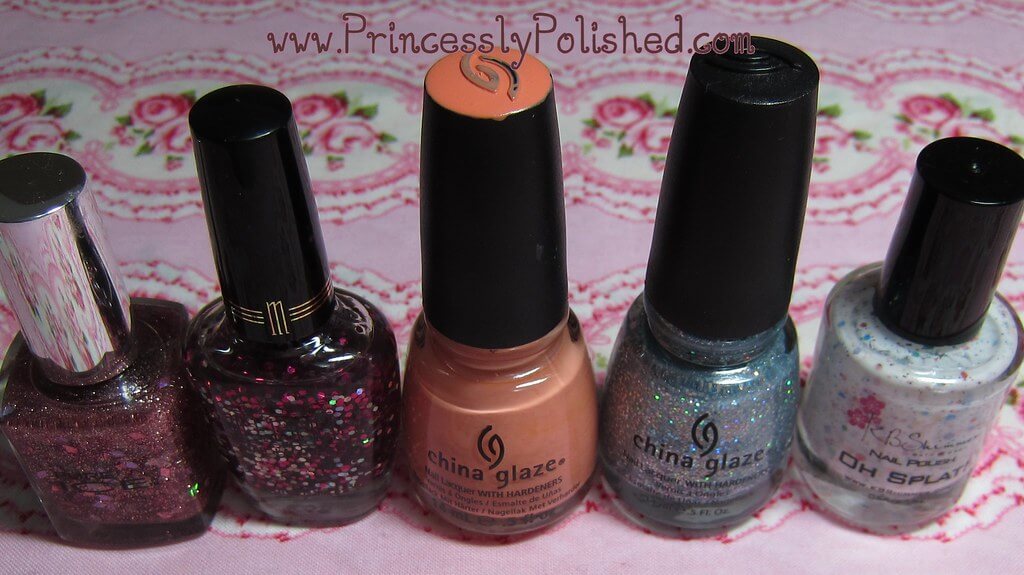
   I did these nails at the end of April.  A super quick manicure of China Glaze Fairy Dust and nail stickers!  Fairy Dust is far more pretty in person than in pictures - it has so much sparkle!


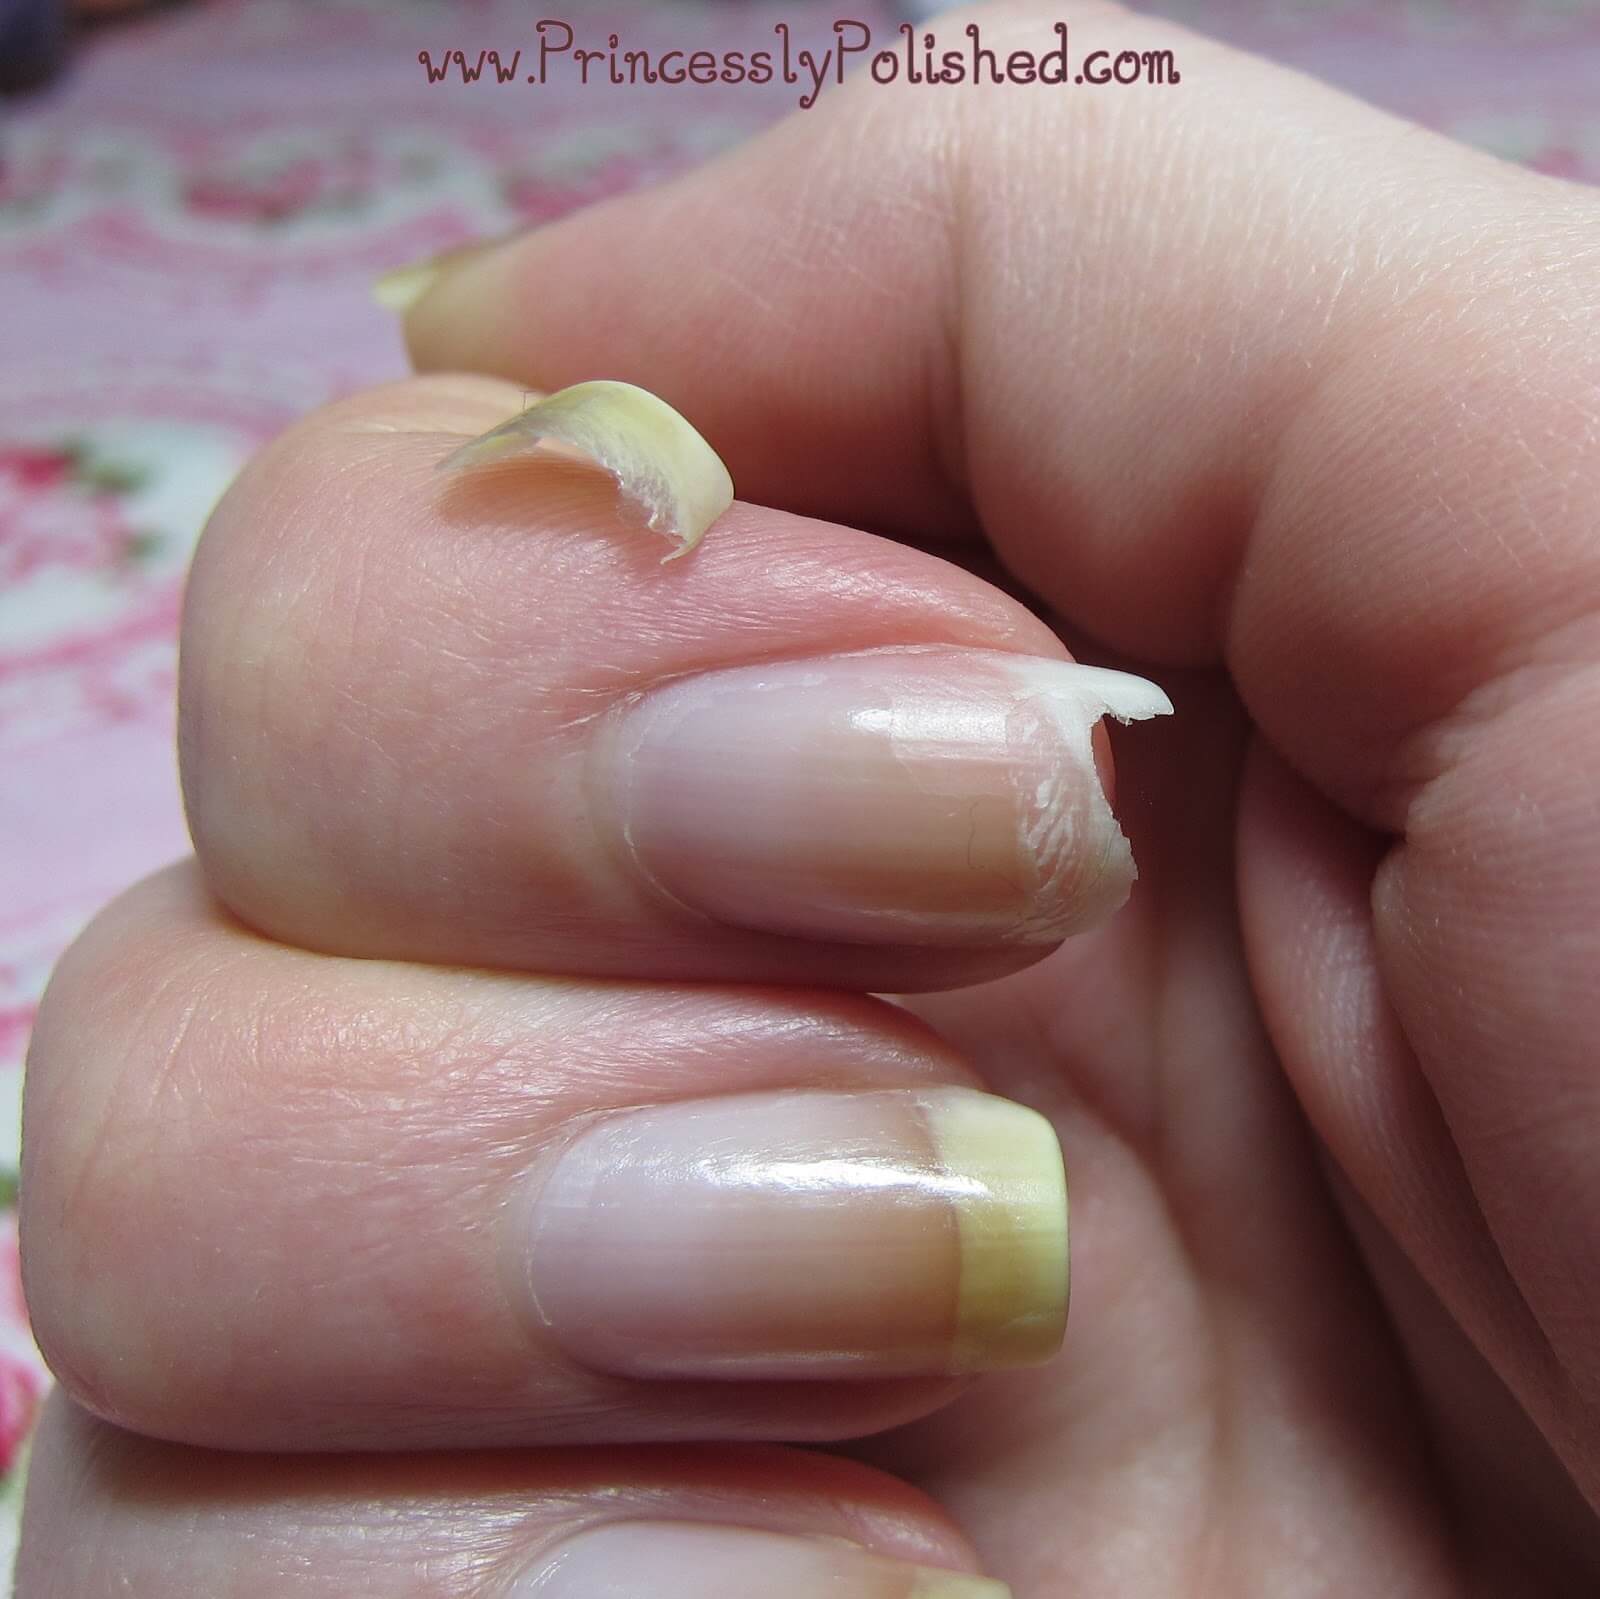
   And one thing I'd like to share about my blogging break is that it included my nails, as well.  I wasn't sharing any manicures on Instagram simply because I wasn't painting my nails - I could hardly even keep them shaped!  Check out what I deem my Most Hideous Nail Break Ever, which happened in March:

Yikes!  That really hurt!

   My nails are doing so much better now, and are finally stain free.  I'm hoping to keep them that way!  I'm sure that will only last until I'm craving a good black polish manicure (and then another, and another) though, haha.


   Anyway, what's this business about me going on vacation?  Didn't I just take 2 months off?  Am I ever going to blog for real again?

   Yes, I will be blogging again!  I have some fun reviews to do and plenty of polish to swatch.  In fact, I have a few posts scheduled to go Online while I'm on vacation, so it shouldn't be too quiet around here.  Some of the posts will be special announcements, too.  =)

   I'll also be sharing vacation photos via Instagram as I travel, so follow me there if you're interested in some East coast scenery.


   Thanks for sticking around during my long break, and hello to the new followers of my blog, too!  I wasn't logging on to my blog every day, but every time I did I saw that I'd had a gain in either followers or page hits.  That's pretty awesome, and it means a lot to me.   See you again soon!

Monday, February 11, 2013

Different Dimension: All Red-y In Love Glitter Gradient

Nail Art / Review


   This was actually a practice session that I felt turned out well enough to share.  I love glitter gradient nail art, but I'm not very good at doing them!  In particular the gradients that start at the cuticle and fade out.  Different Dimension All Red-y In Love is packed with glitter and easy to work with, so I think I did okay this time!  My base was two coats of China Glaze Frosty, a pretty white shimmer that is quite sheer.


   This macro shot of All Red-y In Love shows off the glitter, but none of my pictures is showing just how extremely sparkly it is!  A mix of red, pink, and silver holo glitters, including a dash of holographic red hearts.  I had left my bottle upside-down overnight before using it and had no trouble getting to the hearts that way.

   All Red-y In Love is one of the nail polishes I named!   If you'd like a bottle you can find it in the Different Dimension etsy shop.  =)

Friday, February 1, 2013

January 2013 Hauls

   Or, why it's going to be easy not to buy any polish during February.  (So long as China Glaze doesn't release their new holographic polishes in the US.)


   I ended up with over 35 new (or new-to-me) polishes this month, the above photo is missing a few because they are either on loan or scattered through my house.  January was a good month for polish because all my end-of-the-year sale purchases arrived along with a few sakes that took place right at the beginning of January.


   I snagged some Black Cat Lacquer polishes from my wishlist, they are: I Want Candy, Let Them Eat Cake, Put a Bird On It, and Women & Women First.  These came from etsy.  These are all so, so pretty!


   I had a most wonderful package of Different Dimension nail polish arrive.  Mostly colors that I've helped name, but a few other pretties to swatch and review, too!  I've gotten to try most of these already, and their posts are up on the blog.  The polishes shown above are: Honesty Feels A Lot Like Mean, Orbital, Vervain, Aorta Miss You But I Don't, All Red-y In Love, A Love Hue, and Love Her? I Don't Even Lacquer!  Not pictured because it is on loan to my Mom: Yours, Mine, and Flowers.  You can find these polishes on etsy.


      I picked up a couple discontinued polishes from Laquerlicious, Invitation Only and Mint N Chip Frappe.  Along with those I was sent three minis to review, Melted Ice Cream, Rainbow Sugar, and Tart Taffy.  Go check out those swatches!  These also came from etsy!


   Lush Lacquer had a sale, so I picked up my first polishes from them.  The colors I picked are Glitter Girls, Mr. Bubble, Oopsie Daisy, Pebbles, Pink Panther and Slumber Party.  These are all so cute!  Visit the Lush Lacquer shop on etsy.


   I snagged a couple OPI polishes from my wishlist, My Boyfriend Scales Walls and Don't Touch My Tutu!


   When Zoya had their promo for three polishes my husband got me a few cremes from my wishlist: Breezi, Jolene and Wednesday.


   These polishes were partly from a trade and given to me.  Pure Ice Material Girl, Milani Hot Pink, China Glaze Peachy Keen and Luna, KBShimmer Oh Splat!


   And nail polish in another form - jewelry!  Sweet Tips Nails had an amazing sale, so I picked up some necklaces and other accessories.  These are really cute!  The shipping prices are really good, too.  And yes, these came from etsy, too!

   So, a pretty good haul, I'd say!  A lot of polish to keep me busy this month and a lot of it from indie sellers.  The plan this month is to be good and not buy much.  ;P