Showing posts with label stickers. Show all posts

Wednesday, March 26, 2014

ILNP: Music Box & Zoya: Mia

Swatch & Review / Nail Art


   I can't resist a good minty aqua polish.  I have so many creme hues in this family that when I saw Music Box it only seemed right to branch out into the holographic end of things.  I'm wearing 3 coats of this pretty polish, and I found the formula to be agreeable.  This isn't a super-strong holo polish, but the effect is more prominent in person than it shows in photographs.  And out in the sunshine it really does serve up a dollop of rainbowy goodness.

Friday, December 13, 2013

Sally Hansen: Sparkling Water #TripleShine Nail Polish

Swatch & Review / Nail Art

   This was one of the items provided for review in my Violet VoxBox from Influenster. They would like us to share a "shining moment" we had while wearing the polish.  I didn't actually get to wear this for very long, but I did dress Sparkling Water up with some pearl-chain nail stickers.  As I was finishing my manicure, I had a realization...

   Are nail stickers "cheating" when it comes to nail art?  Should they even count?  Yes.  Just because you make a cake using a box mix instead of from scratch, will someone claim that you didn't bake a cake: you cheated?  No, you just made what you currently had time and ability to do.  We all admire the hand-piped frosting flowers, the mind-blowing 3D fondant creations that make their way to Pinterest collections... but sometimes you have to be content with sprinkles.  In the end it's tasty, you did make cake.
    With nail stickers and decals... they are quick and easy to master, but do take skill to apply in a creative, eye-pleasing way.  So what if I didn't sit down with a tiny brush and make each dot myself.  I still chose where I wanted the design, carefully cut them to the proper length, and carefully applied them with tweezers.  That's all I had time for.  And you know what?  It was pretty, I enjoyed the look - I did nail art.
   Now, let's get to what we're really after: a proper swatch and review of Sally Hansen Sparkling Water!

Monday, June 3, 2013

"I'm a Mama!" Manicure with Lush Lacquer: Glitter Girl

Special Announcement / Nail Art

   That's right, I'm pregnant!  And what better way to announce it on my blog than with a special manicure?  Polish details first for those who came for the swatches, pregnancy details after for those who care.


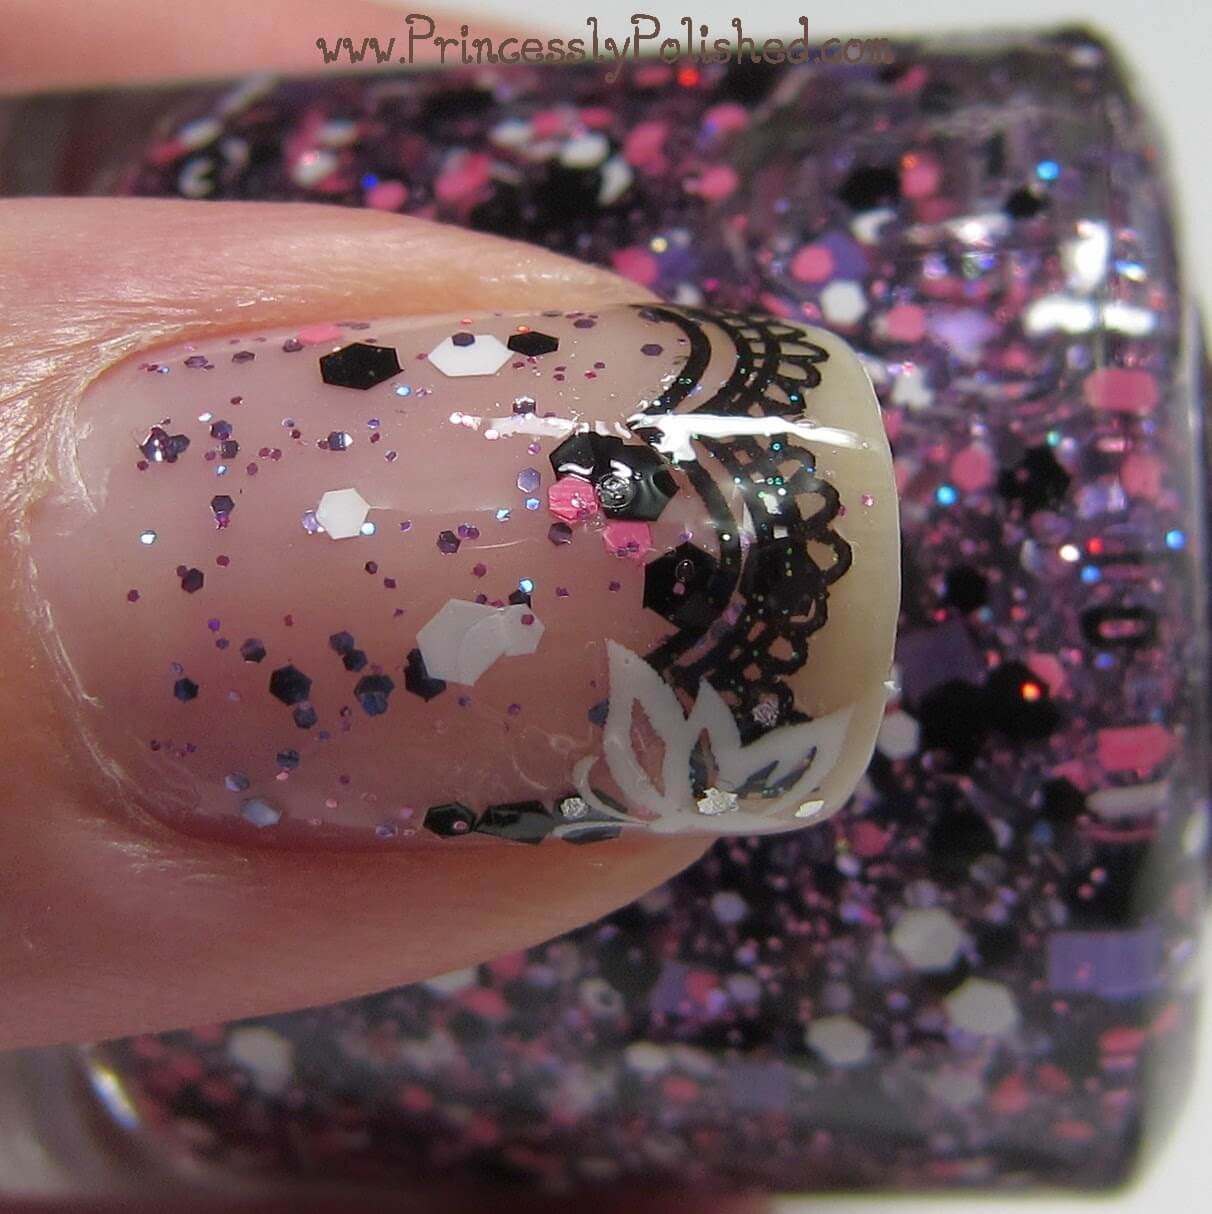
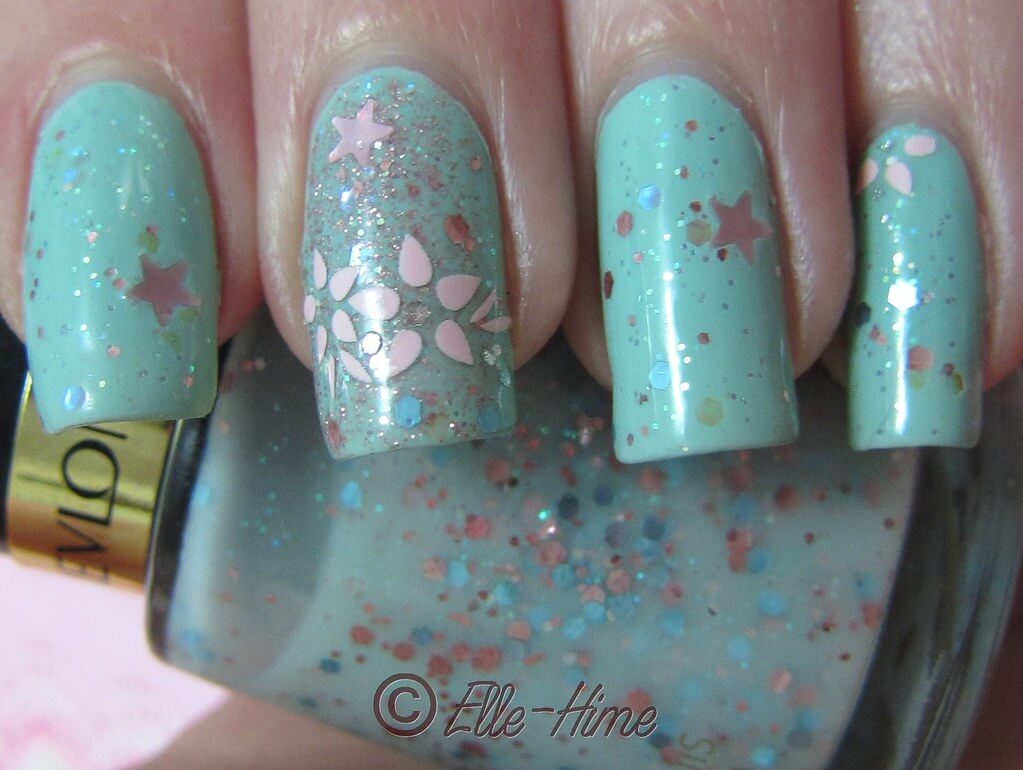
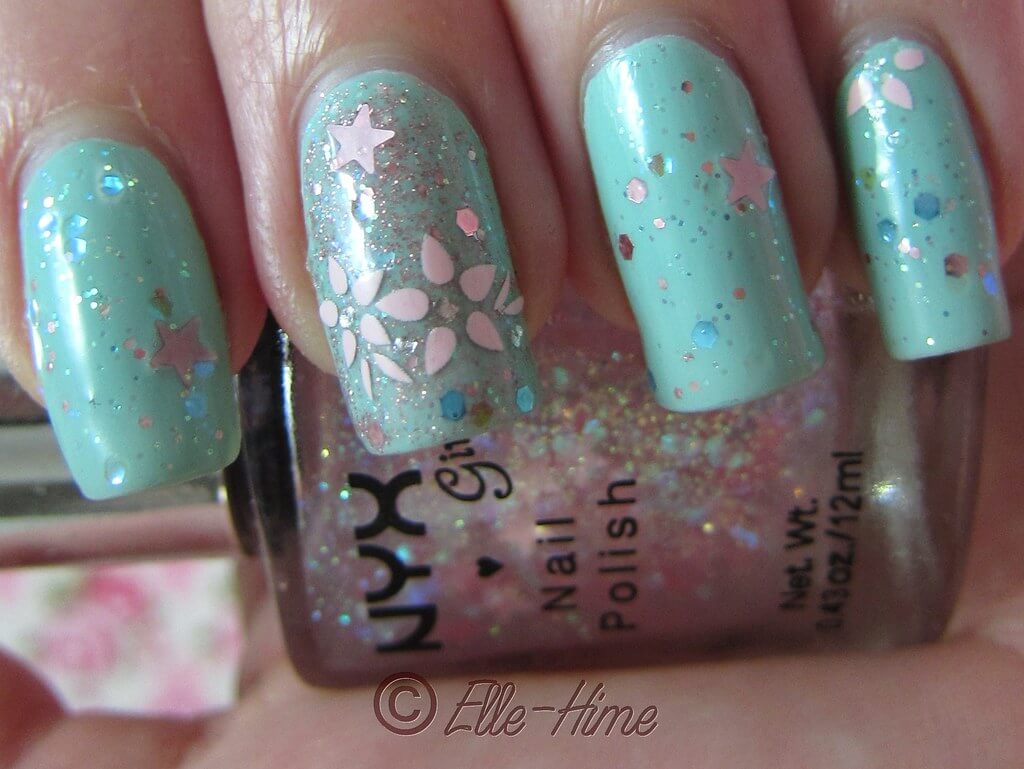
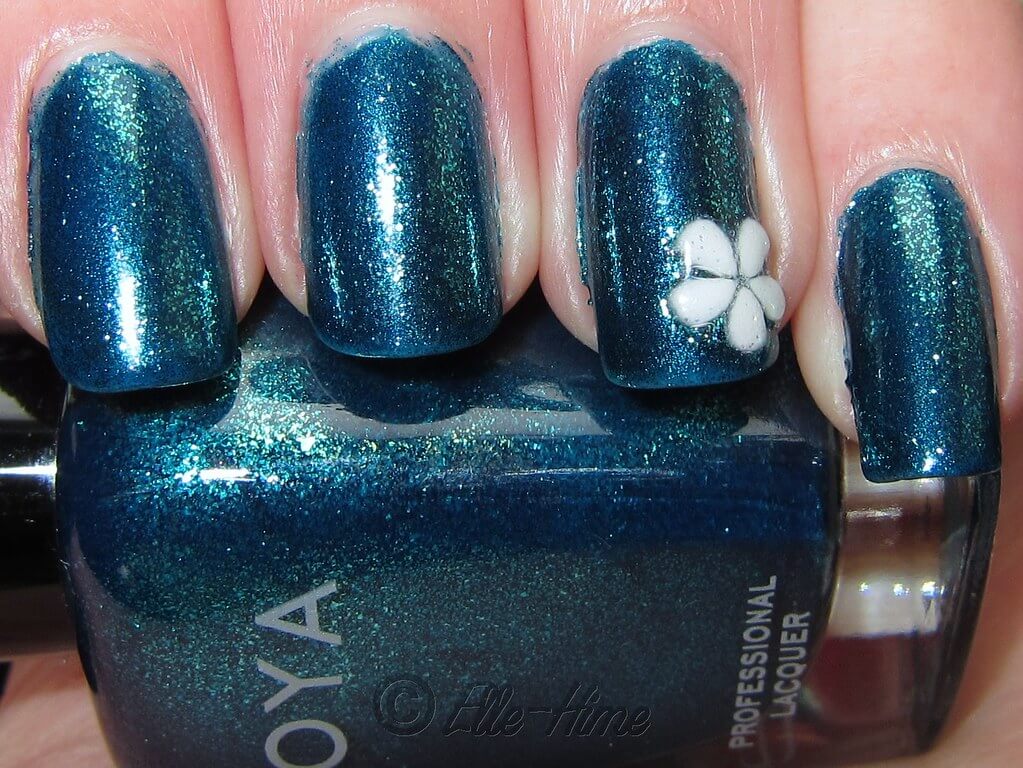
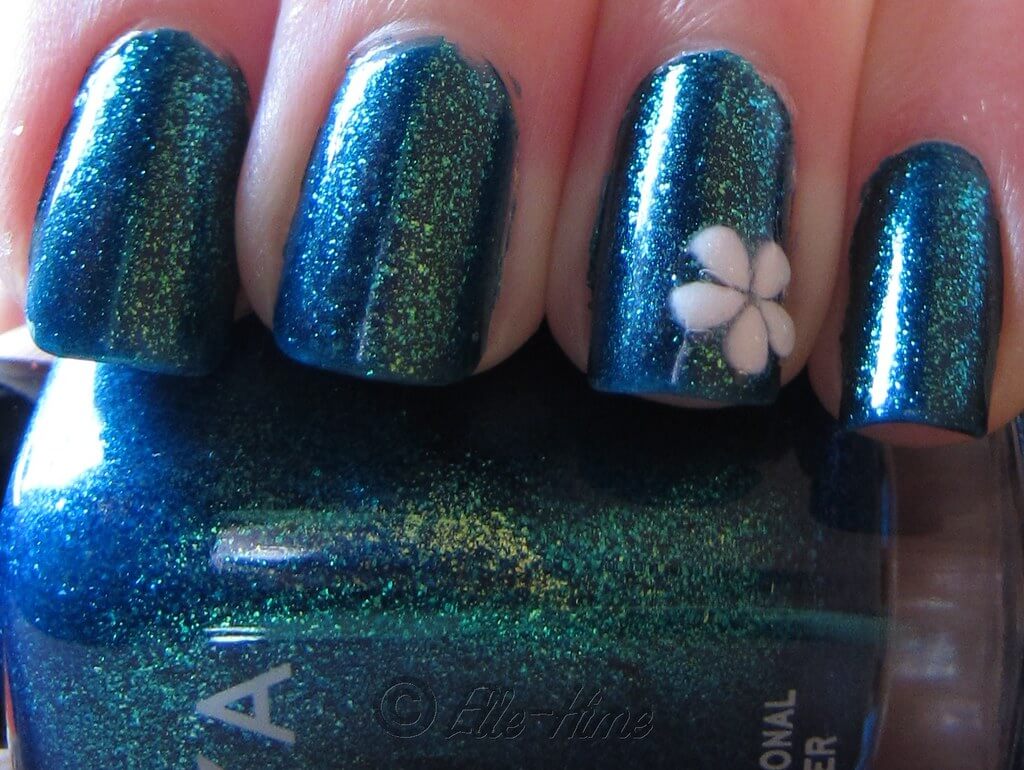
   I love-love-love this manicure!  I wanted something that was a combination of girly, classy, feminine and fresh, and that is exactly what I got!  I started out with 1 coat of Zoya Scarlet, a sheer color that matches my nailbeds.  Then I carefully dabbed Lush Lacquer Glitter Girl on so that the free edge of my nail was left bare.  The lace design came from a sheet of nail stickers that I cut to size.

   The nail stickers are not quite as wide as my nails, and the reason for this is that if the stickers go right to the edge they won't be properly sealed in by top coat!  The shortage on my thumb was a bit too noticeable so I layered on a butterfly nail sticker for an accent.  In order to seal everything smoothly I used 2 coats of my Poshe fast-drying top coat.


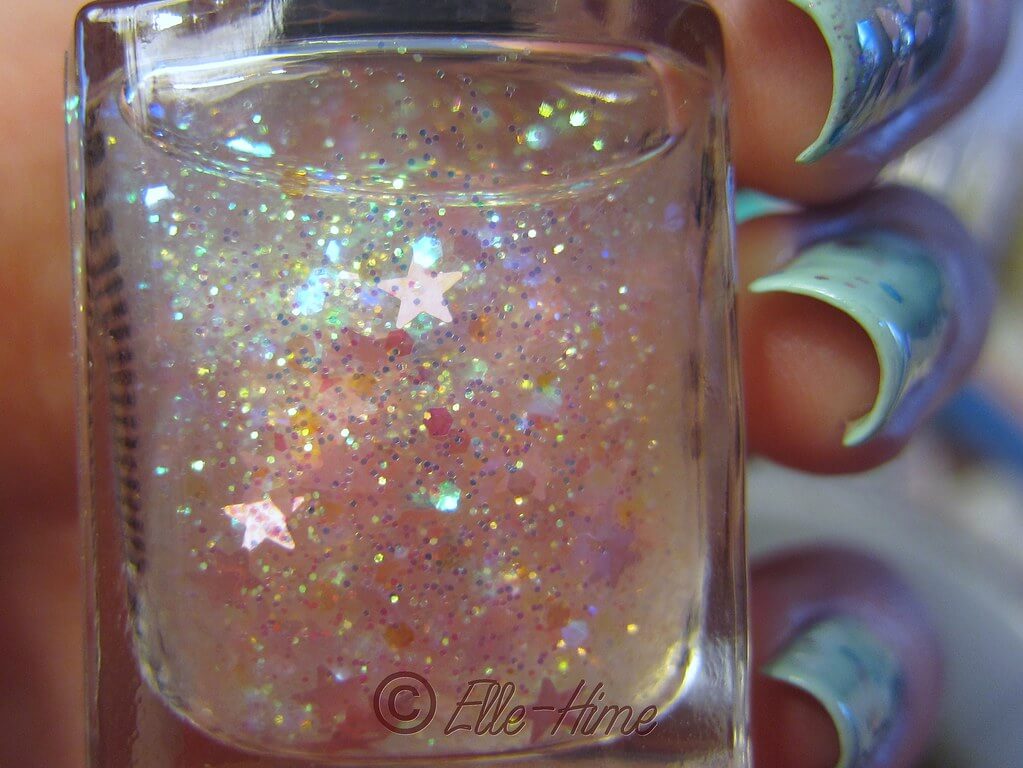
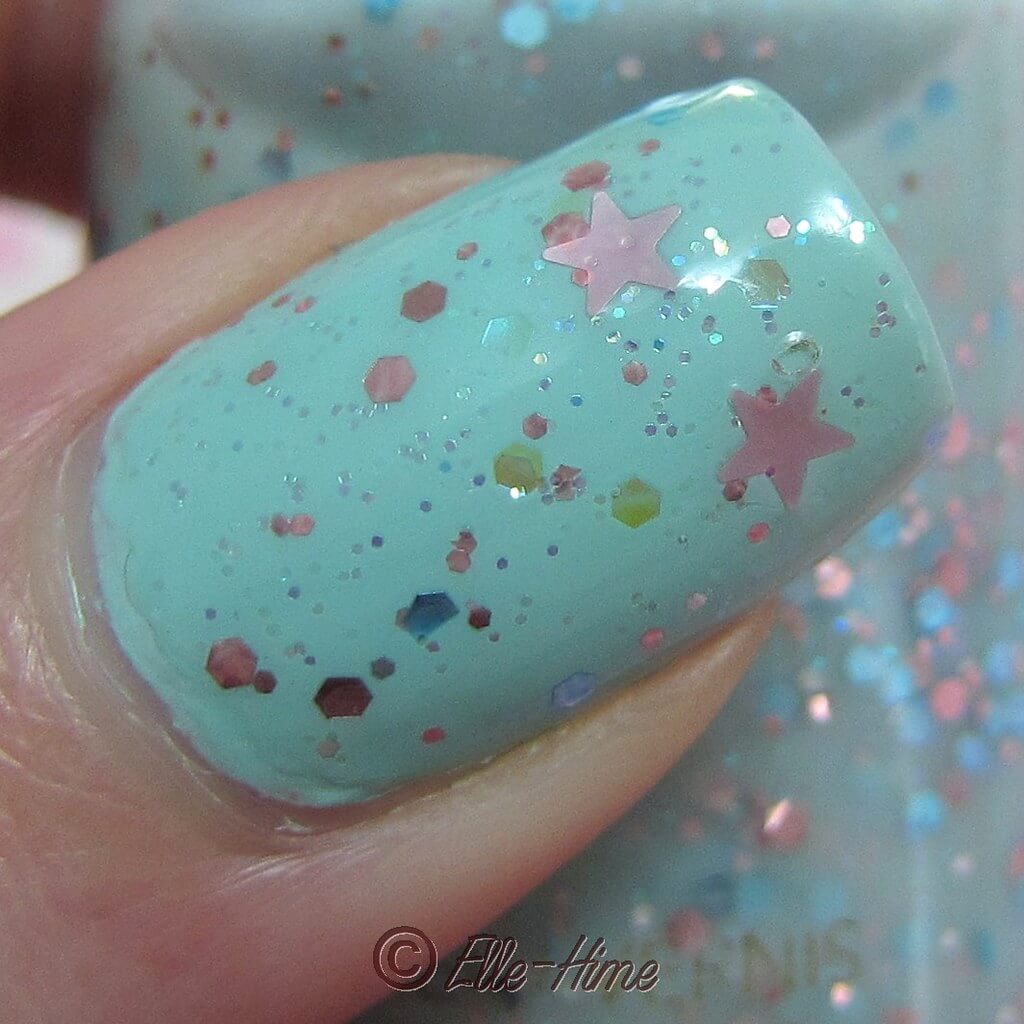
   Glitter Girl is a really great polish and worked perfectly in this style.  I only used one coat, and I didn't get every type of glitter that I saw in the bottle (no purple squares), but that is okay with me.  I really like the mix of matte black, white, and pink hexes and tiny sparkling purples and pink.  The free edges of my nails get to peek out in their natural state, so tip wear on this manicure should be super easy to hide...


   Back to my special announcement:  I'm pregnant!  I've been holding out on posting anything Online even though my husband and I knew right away.  Fuzzy ultrasound evidence reveals that we are having one little girl.  (Did you already guess that from the Glitter Girl polish used in my manicure?)  My due date is Sept 21st, so we'll be having a very-end-of-summer baby or, if she stays in for a little extra cooking time, an early autumn baby.

   So far the pregnancy has been going really well and my biggest complaint is fatigue and general achiness.  In fact, that is the reason for my blog going unattended early this year.  The first trimester hit me like a ton of bricks and all I did was work, sleep, eat, sleep and sleep.  That is no exaggeration - just ask my husband!  I probably wouldn't have made it through if he hadn't been there to take such good care of me.

   I don't plan to turn Princessly Polished into a "mommy blog".  I guess I technically am a mommy blogger no matter what I write about now, but the main focus here will continue to be nails, beauty and personal style.  Expect a few maternity-themed posts in the future, but someone please slap me if I start posting about dream nursery setups, okay?  ;)  As always thanks for reading, enjoy your day!

Friday, May 3, 2013

Back From My Break... To Go On Vacation!

   Hi there, do you remember me?  Rochelle, that girl who was doing something I think we call "blogging" at the beginning of the year?  Yeah, I've been away for awhile.  I apologize for my unexplained absence, but I promise it was for good reasons!  I'm keeping this post short, but I do have some nails to share:


   I did these nails at the end of April.  A super quick manicure of China Glaze Fairy Dust and nail stickers!  Fairy Dust is far more pretty in person than in pictures - it has so much sparkle!


   And one thing I'd like to share about my blogging break is that it included my nails, as well.  I wasn't sharing any manicures on Instagram simply because I wasn't painting my nails - I could hardly even keep them shaped!  Check out what I deem my Most Hideous Nail Break Ever, which happened in March:

Yikes!  That really hurt!

   My nails are doing so much better now, and are finally stain free.  I'm hoping to keep them that way!  I'm sure that will only last until I'm craving a good black polish manicure (and then another, and another) though, haha.


   Anyway, what's this business about me going on vacation?  Didn't I just take 2 months off?  Am I ever going to blog for real again?

   Yes, I will be blogging again!  I have some fun reviews to do and plenty of polish to swatch.  In fact, I have a few posts scheduled to go Online while I'm on vacation, so it shouldn't be too quiet around here.  Some of the posts will be special announcements, too.  =)

   I'll also be sharing vacation photos via Instagram as I travel, so follow me there if you're interested in some East coast scenery.


   Thanks for sticking around during my long break, and hello to the new followers of my blog, too!  I wasn't logging on to my blog every day, but every time I did I saw that I'd had a gain in either followers or page hits.  That's pretty awesome, and it means a lot to me.   See you again soon!

Friday, November 9, 2012

Whimsical, Dreamy Glitter is a Home Run!

NotD / Nail Art

   Yay for titles made from the names of polishes used!  I did some pretty pastel nails for my Happy Halfiversary (you know, the 6-month mark of being married!) manicure.


  I love layering glitter over cremes, and I love mint green with pastel pink...  Yes, I am very happy with how it all turned out!  I also love finding cheap polishes that I can fall in love with.  Here are the polishes I used:


   Finger Paints Hue Left A Message? is an adorable micro glitter which only has a cameo in this manicure.  Pure Ice Home Run, a wonderful mint green creme - I used two coats as my base!  Nyx Girls Dreamy Glitter, and Revlon Whimsical.  Then I added nail art stickers to a couple nails as accents.

- One week to go on my giveaway, which includes a bottle of Whimsical! -

   I used one coat of Whimsical over Home Run, which didn't alter the color at all because Whimsical has a similar base color that is very sheer.  You can transform it quite easily, so rather than use 4-plus coats of it alone I prefer it for layering.  After Whimsical I tried a thin coat of Hue Left A Message? on my middle finger, but the glitter was still more concentrated than I wanted.  I moved on!


   The next polish was Dreamy Glitter, a mix of pastel pink stars, iridescent hexes and small iridescent glitter in a translucent pink base.  I really love this polish!  It is easy to work with, spreading nicely and not impossible to get the stars out of the bottle.  Plus it is pretty cheap.  ;D

Enjoy this yummy macro shot of the bottle!
   To finish my manicure I used a fast-drying topcoat and went to bed.  The next morning I added a pastel nail art sticker to my accent nail so my lonely Hue Left A Message? nail wouldn't look so out of place.  I put on another top coat layer which smoothed the star glitter pieces out better.


   Thanks for letting me share these with you, hope you enjoyed them as much as I did!  A quick note on the ragged cuticle area on my index finger; I cut my finger badly two weeks ago and as it heals it keeps peeling.  I can't do much about it other than give it time.  I took these pictures at the beginning of the week and I'm still wearing this manicure today.  My index finger is looking a lot better, and amazingly my nails only have tip wear.  I'm also happy to say that my nails have grown out to a good length and patient filing has earned me an even square shape... finally!

Friday, February 24, 2012

Deep Sea Mermaid Nails

   Ever come up with something that you know is really pretty but you're just not sure if you love it on yourself?  That's how it is for me with this mani.  It looks beautiful, but I just wasn't feeling it the way I thought I would.  At any rate, here are what I call my "deep sea mermaid" nails:


   Gorgeous, right?  That is two coats of LA Girl Deep Sea Mica topped with one coat of Zoya Charla.  There are a few more pictures after the jump, including Deep Sea Mica by itself.