Wednesday, July 31, 2013

July 2013 Hauls


   After so little buying of STUFF this summer, this month's haul feels HUGE!  I've been quite happy with "shopping my untrieds", but I did pick up some really awesome new goodies as well!


   If the above picture seems a little bare in the upper right corner, that's it is.  I missed a polish!  Fortunately I managed to include it in the "close-up" photo...

Pure Ice Fairy Godmother and Salon Perfect Kaboom.
   These were both found at Walmart.  I've already swatched Fairy Godmother, which I love.  It's a perfect shade of purple and only $2 for a bottle!  Kaboom is a Floam-type glitter dupe, and the only one I found from Salon Perfect's summer neon glitter collection.  I'm really surprised that China Glaze didn't decide to put out these colors under their name, and make them more widely available.  Oh well.  I figure it should be handy for nail art!  Between one polish being a tricky purple and the other a neon these are very hard to photograph, but this quick picture is actually pretty accurate on my screen.

Color Club Beyond, Over The Moon, Kismet, Cosmic Fate, Miss Bliss and Eternal Beauty.
   The entire 2013 Halo Hues collection!  These were a gift from my husband, which makes them even more special!  I had the collection on my wishlist and he snagged them right away (without my knowing) when I found them at a decent price on Amazon.  The colors are awesome and very holographic.  I hope that Color Club keeps releasing more Halo Hues because they are so good for the price!

I♥NP Once Upon A Starry Night, Angel Burp, A Nice Chianti, All Gold Everything, Purple Stuff, 11:59, and (still boxed) Silver Spoons
   I snatched up polishes on my wishlist that were being discontinued when I Love Nail Polish announced them going on sale.  So far I've tried Once Upon A Starry Night and Angel Burp and shared them here.  I really love these polishes, from the super-cute but practical packaging they come in to the pretty bottles with their thin grippy handles.  The shipping was fast, too!  So glad to finally have these pretties in my collection~  These came right from http://www.ilnp.com/.

Cirque Dark Horse, Galinda, XX, Lullaby, Iris, and Kaleidoscope
   Finally, I splurged and bought all the Cirque Colors polishes on my wishlist.  They were actually all in stock at the same time (they never are during a sale... =( sigh!) so I gave in.  Didn't want to miss them if they get phased out or something!  I can honestly say that these babies are STUNNING.  They've been swatched on a lot of great blogs already, but I'll be sharing my own creations with them, too!  I have a sneaking suspicion that photos aren't going to do them justice, though...  These came from http://www.cirquecolors.com/home/.

   So, that's the damage for this month.  So many very nice polishes, it's hard to know what to try next!  If you have any requests for what you would like to see layered, compared, or reviewed in particular leave a comment below!

Monday, July 29, 2013

Mont Bleu Giveaway Winners!


   Hello everyone!  I'm happy to announce the winners of the International giveaway sponsored by Mont Bleu today.  Send your congratulations all around the globe to...


   Our 1st prize winner, Daniela!  Be sure to check out her blog, Why Only For Parties? for some pretty nails.  I wonder what she will pick from the Mont Bleu shop?

   Our 2nd prize winner, Michelle!  I'm sure she will enjoy the glass nail files!

   And our 3rd prize winner, Pearl!  She is also a beauty blogger, writing Precious Pearl Makeup
She has some great nail art shared there.  She chose the pink tweezers that I love so much!


   Thanks again to Design Glassware by Mont Bleu for providing the prizes in this giveaway!  If you're in the market for something sparkly be sure to check out their shop.  My blog's two-year anniversary falls at this time of year, so be on the lookout for more fun giveaways next month!

Friday, July 26, 2013

Different Dimension: Aorta Miss You But I Don't

Swatch & Review


   I was sorting through my Indie polishes when I came across a special bottle that I used but never got around to sharing on my blog - shame on me!  Released at the start of 2013, this is Different Dimension Aorta Miss You But I Don't.  The name makes me giggle, and I'm the one who named it!  This lovely blend of glitters was all Missi's doing, though.  So I feel honored that she thought the name was fitting for it!

   For this quickie swatch I layered one coat of Aorta Miss You But I Don't over Zoya Purity, any I love how it pops on the white base!  There are all sort of pretty glitters floating in a clear base.  The name-inspiring purple hearts, of course, but also magenta circles and larger holographic hexes in pink and red.  What really does it for me is all the pretty microglitter, though!  There is magenta, silver, and even lavender, and it looks sooo lovely together!

   I'm a huge fan of Missi's Different Dimension polish formula.  I ended up wearing this for a couple of days without topcoat. Despite the larger glitters it dries quite smooth; my nails weren't snaggy at all.  A couple larger glitters chipped off but that heart stayed on!  Really impressive all around.  Different Dimension polishes are available on Etsy.  =)

Wednesday, July 24, 2013

Reminder: Mont Bleu Giveaway Ends Tomorrow!

   Here is a quick reminder that my International giveaway sponsored by Mont Bleu is ending July 25th!  There will be 3 winners of great prizes!  Click here to be taken to the giveaway page.


   I will be sorting through entries and contacting the winners over the weekend, so if you did enter keep an eye on your inbox!  Have a great day~

Monday, July 22, 2013

Is Nail Polish Safe During Pregnancy?

   I'm two months away from my due date!  Naturally I want to share my findings on a question of great importance to all expecting manicure enthusiasts: is nail polish safe during pregnancy?  You may be thinking "Well of course it is, or you wouldn't be swatching polishes for us."  This is true, when using products that are safe - not everything is!  Read on to learn the do's and don'ts of mom-icuring!

   Please be aware that I am not a medical professional, and future research could reveal more accurate information than what I have here.  I did a lot of searching, read everything from medical findings to the comments of nail techs, and am simply sharing what I came away with!  Feel free to post your own advice in the comments below.  And when in doubt, go without or ask your practitioner!

Image credit: WhatToExpect.com's article - read it!

Is nail polish safe during pregnancy? 

   The answer to this is yes and no.   So long as you are using polishes with 3-free formulas or better, you can go on painting your nails throughout pregnancy.  Happily, most modern polish brands are sticking with the 3-free or better trend, simply because it is healthier for everyone, pregnant or not.  As a rule of thumb, if you can't read the ingredients (or find them Online) of what is in your bottle, don't use it.  The biggest offenders are usually old polishes, smaller overseas brands, and nail treatments that include formaldehyde.  Indie polishes are quite often safe, but watch out for hobbyists that cannot verify their ingredients. 

   Still, you may not be able to paint your nails simply because of the smell.  If you are suddenly gagging because of a scent, you might find polishing your nails unappealing.  You might be able to tolerate less "stinky" polishes, or simply choose to go without.  Even if the smell doesn't bother you, always do your nails in a well-ventilated area.  And always wash your hands after a manicure session or polish removal to remove chemical residues from your hands.

Is gel polish safe during pregnancy? 

   This salon service has been making it's way to consumers more aggressively than ever, so even though I have no interest in gel nails, I wanted to see if there was an answer.  The answer appears to be yes, they are safe.  There are no toxic ingredients and it isn't fumey.  The UV light exposure is minimal. However, I saw many comments from nail techs who said the manicures would not stay on their pregnant clients nails!  Body chemistry changes during pregnancy, and you may find your gel polish doesn't last the way it should. 

   With all the new types of do-it-yourself gel kits coming out I can't say if they are all safe, and would recommend checking the ingredients before using anything.  Also keep in mind that gel polishes require longer soaking in chemicals to remove - research those to make sure you're okay with dipping your tips in them!  Another concern would be about going to a salon to have your nails done.  Their gels might be safe, but chances are the salon does more than gel manicures.  There may be other chemicals in the air that could be harmful to you.  Because you will be in the salon for so short a time you don't have to be afraid of visiting them, but if you walk in and smell any type of strong fume, walk back out!

Are acrylic nails safe during pregnancy?

    This type of manicure seems to be regarded as the most dangerous for moms-to-be.  Some will claim that it is perfectly safe so long as you're getting them done in a well-ventilated salon, but many people advise against it.  Not only because of the additional chemical exposure, but also because of the added risk of developing an allergic reaction to the nails/products used, fungal infection from the drilling of nail beds, or simply ending up with a broken and very painful nail right when that baby arrives!

   Your nails should start growing faster during pregnancy, so why not see if you can go without your acrylics and grow some beautiful natural nails?  You could consider it a 9-month challenge, and keep track of your progress!

Tips for nurturing and enjoying natural nails:

   So you'd rather go natural to ensure the absolute least amount of chemical exposure.  Or maybe you are experiencing a chemistry shift and nothing wants to stay on your nails anymore.  Whatever your reason for avoiding the lacquer that you love so much, you can still have well-manicured nails.  Here are some of my recommendations of products that are completely safe to pamper yourself with!
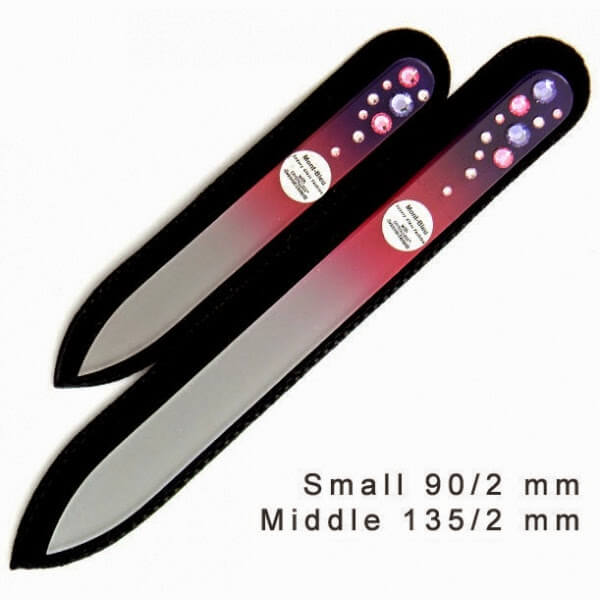
  • A good set of nail files.  Since you'll be looking at your bare nails now is a great time to get them to your ideal shape, or perhaps experiment with a different shape.  I suggest the glass ones sold by Mont Bleu.
  • A luxurious moisturizer.  This could be just about any of your favorite lotions or oils, and might only be limited by what smells you find tolerable.  Many of my favorites can be found in this kit from Burt's Bees.
  • A pair of manicure gloves.  When used overnight with your moisturizers you'll have even better results!  The kit linked to above includes a pair of cotton gloves, which are wearable no matter what season you're in.
  • A nail growth treatment.  Sure, your nails are already growing, but growing fast doesn't always mean growing strong.  My favorite specialty product is Créme Abricot by Dior, which is wonderful for cuticles and nails.

Other things to keep in mind:

    Don't trim your cuticles!  This is usually something to avoid whether you are pregnant or not, because of the risk of hurting your nail beds or introducing an infection.  Infections can be very dangerous to a pregnant woman and her baby.  Instead opt for a softening cuticle treatment, and then push them back if needed.  Regular moisturizing is all most cuticles need to stay well-behaved.

   Your nails might need to go naked for delivery.  This depends a lot on hospital policies, the preferences of your doctor, or if you're having a surgical delivery.  Ask your doctor if you should have bare nails during labor and delivery.  Why would you?  Seeing your nail beds is a quick way to monitor your circulation and oxygen levels.  There are mechanical sensors that do the job of watching your tips, and not all of them can work through colored nail polish.  Clear polish is usually given the okay.

   Be conscientious of the baby.  Even after delivery, that is.  If you're doing your own nails at home, be aware of how sensitive a newborn can be to those fumes.  Always wash your hands after applying or removing polish to get rid of any residues on your skin.  Basically, don't taint the baby.

   Not everyone is going to agree.  You might get some advice from well-meaning (or demeaning) folks that you don't feel is true.  There is no use in arguing, but feel free to explain what you know and are comfortable doing.  After all, the best decision is an informed decision!  So... what will you do with your nails?

Suggested reading:

Saturday, July 20, 2013

Mary Kay Lash Love Lengthening Mascara & Lash Primer

Review

   Good evening, Princesses!  How has your weekend been?  We've finally gotten some rain and cooler weather here.  Today I'm sharing my thoughts on two lash products that I was sent for review via Influenster by the Mary Kay brand, their new Lash Love Lengthening Mascara and Lash Primer.  Here they are being worn together on my curled lashes!


   Like most ladies, mascara is one of my favorite cosmetics!  So I was really excited to get to try these.  (Fun fact: my first ever mascara was a Mary Kay tube given to me by my mother!  Revisiting this brand's lash offerings is quite nostalgic.)  Read on to see how I like them!


 Mary Kay Lash Primer:

   I will admit, I was feeling very apprehensive about this pearly white tube!  A few years ago there was a boom in lash primers, and brands are still releasing them fairly regularly now.  I tried several samples from big name brands and didn't like any of them at all!  The primers always seemed to be goopy and stick my lashes together, which made my lashes turn into "spider legs".  So when I opened the tube and saw that it was a barely-there clear formula, I was intrigued.

Here are Mary Kay's claims taken from the product page description:
   "Add dramatic definition to your eyes to create fuller lashes when used as a basecoat under mascara.  Or wear the clear formula alone for a natural look.
  • Instantly intensifies lash volume and creates longer-looking lashes.
  • Lifts lashes and helps them stay curled longer.
  • Coats without flaking, yet removes effortlessly.
  • Helps mascara wear longer." 
    The formula includes conditioning ingredients such as glycerin, aloe, and a few other conditioners.  Other features are the unique brush - the black and white swirl of bristles aren't just for looks!  The white bristles absorb and deliver the primer, and the black bristles should comb and separate your lashes.

   Application is easy and straightforward.  The brush is average sized and easy to maneuver.  I curled my lashes prior to putting the primer on, and only primed my upper lashes.  I did have some lashes sticking together so I used a lash comb to get them back to feathery fullness.

   I wouldn't call this a wonderful clear mascara on it's own.  I don't think my lashes looked any different wearing only primer, besides holding a curl.  As for helping my mascara to last longer and not flake, well, I didn't notice either of those things happening without using the primer, either.  It may help, but I don't think the Mary Kay mascara needed the help.  I did notice that it made my lashes look thicker once I applied mascara; fortunately not spider leg thick!  Other good things about this primer are that the formula is lightweight and it doesn't make removing your mascara any more difficult!


  Mary Kay Lash Love Lengthening Mascara:

   This mascara was provided in the "I ♥ Black" color; it is also available in brown.  I didn't use any other eye make-up in my photos (besides the primer) so you can see how it makes lashes pop!

Here are Mary Kay's claims taken from the product page description:
   "Long, strong, seriously separated lashes. What’s not to love?
  • Creates bold, instantly intensified length of lashes.
  • Lifts, curls and perfectly separates lashes.
  • Conditions and strengthens lashes.
  • Nonclumping, flake-free formula wears all day for over 10 hours."
    Other features are the inclusion of fibers to physically add more length to your lashes, conditioning ingredients and the spiffy brush head.  It has a slight curve and slightly longer bristles on the convex side.

   Application was easy, with the brush being average sized and having bristles that could reach all my lashes - even the tiny ones! - by turning it the right way.  I really like these molded rubber mascara brushes, I feel like they give better application than the traditional bristly wands (look at the Lash Primer brush, I'm talking about those).

   My lashes were already curled before applying, and the curl held just fine whether I applied the Mary Kay Lash Primer or not.  This mascara does need a few minutes to dry before you open your eyes wide or it will transfer to your lids.  Once it is dry I have not had any trouble with it smudging or flaking, with or without the primer.  The lengthening fibers are subtle and I don't really notice them much.  Overall I find that the only difference using the primer makes to this mascara is that with a primer under it is seems more volumizing.  Lashes appear thicker, and want to stick together more.  This mascara also removes easily!


   Here are a couple pictures of me using these products!  First I used the Lash Primer on my curled upper lashes.  Then I applied the mascara to one eye's lashes to see the difference.


   It's pretty obvious which side has the mascara, isn't it?  I then finished applying the Lengthening Mascara...


   Much better!  Now we can see all those lashes!

   In conclusion, both of these products are solid performers.  Mary Kay's Lash Primer is the best I've ever used, simply because it isn't gross!  It is not a must for me, though.  I don't feel that I need the extra volume it gives, and the good mascaras I use don't flake or smudge anyway.  I will continue to use it on my upper lashes, and I'll try it with some lower-end mascaras to see if they benefit from the primer boost!  I wouldn't bother wearing it by itself; I reach for brown mascara when I want a subtle look!

   Mary Kay Lash Love Lengthening Mascara is very nice.  It doesn't usurp my current favorite, but it is also cheaper per tube.  I will definitely keep using it!  The lengthening fibers don't make a mess of lashes, and it does a good job of grabbing little lashes thanks to the wonderful brush.  It's only fault is a slight tendency to stick lashes together, and the dry time.  I prefer mascaras with a drier formula.  What I like best: it doesn't flake off!


   Many thanks to Influenster and Mary Kay for selecting me to try products in the Glamour Look VoxBox!  These two are definitely my favorite out of the bunch!  Of course, who doesn't love to try new mascaras?  ;)

Wednesday, July 17, 2013

I♥NP Angel Burp over Essie Sweet Talker

Swatch & Review / NotD

   My town is currently experiencing a heat wave, with temperatures hitting 90 every day this week.  (In our little arctic suburb, this is a big deal.)  I don't complain about the weather, but I will admit that it has sapped my creativity the past few days!  I come home from work and crash; it's too warm to get up and do things until 8pm when the sun is going down.  So rather than paint my nails last night, I waited and did them this morning.


   I used I♥NP Angel Burp and Essie Sweet Talker.  I looove this easy-on-the-eyes cotton candy combination!  My nails feel so delicate and pretty.  Both of these polishes were untrieds for me, so let me tell you about them~


   Story time!  Essie Sweet Talker is from their 2010 foray into retail sales.  (In fact, it was an exclusive color, so all bottles of Sweet Talker should have a white printed "Essie" on the side, and a sticker with the name on top.)  This color landed on my wishlist right away when I was first getting into polish, and I managed to track down a bottle (along with a bunch of other colors) on eBay.  Then it was put away in a box, where it sat, and sat... and sat.  I have a few Essie polishes I love, but I learned that more often than not I don't like the brand's formula, so I allowed myself to be distracted by other polishes for quite awhile.  I was afraid Sweet Talker would be sheer, pool-y and need at least 3 coats.  Today I'm happy to say that it exceeded my expectations.  I used 2 careful coats, giving it time to dry in between.  It is actually a bit on the thick side - I'll add a bit of polish thinner to my bottle.  The aqua microshimmer in the bottle isn't as visible on the nail, but it doesn't disappear, either.  And I love the pastel blue.  I want a straight-up creme in exactly this color!


   I♥NP Angel Burp is a really pretty glitter in a shimmery clear base.  On my thumb I'm wearing 2 coats, the other nails had 1 coat.  The formula was a bit thick and I did get some teeny bubbles when I was squishing glitter around with my brush - these really only show in pictures.  I topped it off with 1 coat of Poshe and don't have any texture from the glitters; they are thin and lay very flat!

   And what pretty glitters they are.  Satin pink squares and hexes mixed with iridescent squares!  (I'll definitely be combining this with Nyx Girls Dreamy Glitter sometime for a manicure filled with pink pastel shape goodness.)  The iridescent squares shine with a whole rainbow of soft hues, not just the peachy-pink that you see in the bottle!  If you don't already have this glitter and you love it as much as I do, be quick!  This is another discontinued I Love Nail Polish shade, but I saw it is still available at http://www.ilnp.com/ as of today!

Saturday, July 13, 2013

I♥NP: Once Upon A Starry Night over Pure Ice: Fairy Godmother

Swatch & Review / NotD

   Good evening, princesses!  Here is a manicure that is sure to give you sweet dreams about polish.  ;P  I was fortunate enough to snag Once Upon A Starry Night during I♥NP's clearance sale, and found the limited edition Pure Ice color Fairy Godmother, which pairs wonderfully as a base color.  Also, I think I may have found my "pose" for pictures.  Holding my hand at an angle seems most comfortable.


   I used one coat of I♥NP (I Love Nail Polish - what a great brand name!) of Once Upon A Starry Night, which is a clear-based glitter with a really nice density for using as a topcoat.  The glitters in it are prismatic, silver, blue, and matte white.  It contains holographic silver stars but not very many of them.  Getting one of the stars is a treat, and the nails without stars don't look like they are lacking.  I've had this polish on my wishlist since I first saw it announced last year!  Sadly this shade is now discontinued - sorry!

   ILNP definitely earns their tagline of "boutique nail lacquer": the super cute packaging, the wonderful brush and good formula...  I'm not sure if this bottle is made with the original or reformulated glitter base.  (The suspension base was changed after complaints that the polishes were great but smelled horrible.)  I can say that this does have a polish smell but it is not at all offensive!


   Pure Ice Fairy Godmother is a perfect amethyst shade that will. not. photograph. accurately.  I tried color-correcting the photos and gave up, because by the time the polish was looking right my hands looked fiery.  Yes, this is a cool-toned purple, but it is more red than this.  It's a medium type of purple that isn't too bright, too dark, too pastel or dusty.  It also seems to have a faint hidden shimmer.  I used two coats, and coverage was very good.  The formula is on the slightly thick side.


   These are two really pretty polishes that work great together!  Pure Ice is sold at Walmart, and you can find I♥NP shades at their website:

Wednesday, July 10, 2013

Video! Influenster Unboxing: The Mary Kay Look VoxBox

Video

   Hello everyone.  Guess what I did?  I made another YouTube video - finally!  And this one is extra special because it's a video of me, including a bit of baby belly!   I made the video to show what came in my Mary Kay VoxBox, and talk about my thoughts on the products.  I'm trying them out this week, so you'll be hearing more about them soon!


   I was sent these complimentary products in exchange for my opinions; you can learn more about Influenster here!

Monday, July 8, 2013

Holographic Gem Blossoms Manicure

Nail Art / Swatch & Review

   I'm wearing an extremely princess-y manicure today!  I did these nails Saturday after deciding I wanted something holographic and was inspired by some pretty glitter gradients on other blogs.  Then I realized that all the polishes I used were essentially untrieds - swatched but never used in a manicure.  So I'll be talking a bit about them, too.


   So pink, so girly, so great!  For as much as I love pink I don't do pink nails that often.  I have a hard time finding the right pinks for my skintone.  These are the polishes I used:

Color Club Halo-graphic, Milani Pink Flare, Nyx Girls Dynamic Glitter and Salon Perfect Silver Sparkler.

   First let's talk about Color Club Halo-graphic.  How did I let this go for so long without doing a proper manicure with it?  From the 2012 Halo Hues collection, this pink is gorgeous in the bottle and cool-toned enough that I find it wearable.  I used two coats on my thumbs, index and pinky fingers, then my regular Poshe topcoat.  Once the manicure is totally dry the holographic effect comes back 100%.  Application is good for a holographic polish, but isn't very self-leveling.


   Milani Pink Flare is part of the One Coat Glitter line, but it is most certainly not opaque in one coat.  My right hand, pictured above, shows this polish at one coat on my ring finger and at two on my middle finger.  Both have one coat of Halo-graphic as a base/underwear color.  I must say I love this glitter, it is the perfect combination of soft and sparkly.  Different from my expectations but I don't like it any less.

   The photos below show my left hand.  I had the good sense to wrap my tips with Halo-graphic before putting on a coat of Pink Flare, so the sheerness isn't noticeable unless you're really looking.  My middle finger (three flower-shape paillettes) is wearing 4 coats of Milani Pink Flare, and if you look closely you can still see some VNL.  As soon as I saw how sheer it was I put a base coat of Color Club Halo-Graphic down on my ring finger, and only used two coats of Pink Flare.


   For the gradients I used a combination of Nyx Dynamic Glitter and Salon Perfect Silver Sparkler.  I started off by dabbing Dynamic glitter at the cuticles and then placed individual glitters from Silver Sparkler to fill in spaces that needed it.  I also used loose flower paillettes to enhance the gradient nails.  These nails would have had a lot of texture so I used extra topcoat until they were smooth and super glossy!


   The only negative thing about this manicure is that it is SO sparkly that it is hard to photograph!  There is so much glitz that my camera seems to be at a loss about which nail to focus on.  Of course, that quality is also what makes it so fantastic.  I'm really enjoying this glittery, rainbow-filled manicure!  =)

Friday, July 5, 2013

International Giveaway from Design Glassware by Mont Bleu!

   Hello everyone!  I'm hosting a fantastic giveaway sponsored by Mont Bleu!  Let's give them a big thank-you for the opportunity because these prizes are awesome, and they are available to everyone following Princessly Polished!  =D  What are you waiting for?  Read on and get to earning those entries!

The Prizes:

   First prize - a 20€ Gift Voucher to be used on www.Design-Glassware.com
   This should be pretty obvious; 20€ to spend however you'd like!  (While browsing the store you can easily switch currencies using the drop-down menu in the top corner.)  They have so many pretty items that the only problem with this prize is having to choose what to buy!

   Second Prize - a set of Glass Nail Files

   I chose this pretty set as an example to use for second prize, but if pink and purple isn't your thing, that's okay.  Mont Bleu is offering to let you choose your own mini and full size file from their store to create your own set!  If you win second prize you'll be able to choose from...
   Check out my review of the glass nail files from Mont Bleu - they are fantastic!

   Third Prize -  a pair of Eyebrow Tweezers
    The third prize winner will get a pair of tweezers just like the ones I got to test and review!  I absolutely love these, and I'm so happy to be able to share a pair with Mont Bleu's help!  Mine are pink, and besides the purple you see above you'll be able to choose from pure black, clear crystal, light blue, pale green, yellow, or orange!  What would you pick?

The Rules:

   This giveaway is open Internationally to all followers new and old!  It ends July 25th, 2013.
   You should either be 18 years of age or older, or have the consent of your parents/guardians to enter.
   All entries are recorded using the Rafflecopter widget below, and falsified entries will be removed.
   The selected winners will be notified by E-mail and each have 24 hours to respond before another winner will be chosen.  I will put the responding winner in contact with Mont Bleu so they can receive their prize!
   Any questions or clarification needed, let me know!
a Rafflecopter giveaway

Wednesday, July 3, 2013

Seven Summer Shades Giveaway Winner, + More to Come!

   Good afternoon, fellow princesses!  How have you been?  I've been busy.  Where did June go?  My last giveaway ended on June 30th, and today I'm announcing the winner.  Say congratulations to...
   ...my Bloglovin' follower Nicole!  Yay!  I hope she enjoys her colorful new polishes.  =)

   I do have to apologize, though.  I got my wires crossed about the close of Google Reader also meaning the end of GFC (Google Friend Connect).  I don't feel too stupid, though, because a lot of bloggers got this impression.  And it did close, partly.  Now it only works with Blogger blogs.  Honestly, I wouldn't be surprised if Google eventually forces everyone to switch to Google+ and gets rid of GFC entirely, or perhaps replaces GFC with something else.  Who knows.  So, I still suggest giving my post about other methods to follow my blog a look.  And I'd love to know if you're using something I haven't covered!

   Now, more exciting stuff!  Two years ago right around this time I began blogging.  A lot has changed within this time and really it has all been for the better.  To celebrate these fun two years I have some awesome giveaways coming up this month.  Stay tuned for more!

Monday, July 1, 2013

Tutorial: Gumball Machine Nail Art


   Hello, dear readers!  I'm so excited to share this post with you!  Not only am I sharing some cute original nail art I did, I'm teaching you how to do it with a tutorial!  This is my first time creating a how-to collage (it took some trial and error), so please give me your feedback!  First off, some information about the polishes I used.

For the gumballs: 
China Glaze Happy-Go-Lucky, Grape Pop, Four Leaf Clover, Suger High; Sally Hansen Sun Kissed and Zoya Breezi

For the gumball machines: 
Zoya Elisa and Pure Ice Silver Mercedes

   Obviously gumballs and their dispensers have a lot of room for creativity with colors, and you could pick pretty much anything you want.  I wanted something easily recognizable so I reached for the classic candy and dispenser colors.  This design works really well on squared nails, and takes advantage of your natural nail shape to create the glass dome of the gumball machine.  All you need are your nail polishes, some dotting tools, and french tip guides.  On to the tutorial!


   Yay, it's easy!  And fun - I had a blast wearing this manicure.  All kinds of people wanted to check these colorful nails out, and they could tell what they were!  To me, that's nail art success.  What do you think?  If you try this please leave a link in the comments below so I can check it out!  =)