Showing posts with label np-prism. Show all posts

Wednesday, January 22, 2014

Color Club: Kismet (and updates)

Swatch & Review


   Today I have swatches of the very pretty Kismet from Color Club's second Halo Hues collection.  Before I gush about this holo I want to give a few updates about what is going on around here, though! Exactly 1 week ago I got a phone call from work saying "hey, we got the return to work note from your doctor, you're on the schedule next week".  Next.  Week.  As in yesterday.  My husband and I were so not expecting that!  We both figured I'd have until the end of January before I was given any hours at work.  So, last week quickly unraveled into hasty baby-sitter planning and me trying desperately to get as much as I could done before Sunday.  Only I didn't get a whole lot done because I mostly made myself depressed and incredibly stressed out.

   Now that everything is done I'm still recovering from my migraine-filled weekend, but work has been fine.  Little Freya does just fine without me for 9 hours, and having to pump breastmilk on my lunch break isn't so bad after all.  Still, this does eat up more of my time.  Until I become a Super Mom who can do it all (ha) I am aiming for a blog post schedule of Wednesdays and Fridays.  If I can manage anything more than that I'll just consider it a happy bonus until it becomes regular.

Wednesday, December 11, 2013

I♥NP: Bottle Service and Pt 78

Swatch & Review


   I paired two of the newest I Love Nail Polish holographic polishes together to test them out.  Here are my thoughts on Bottle Service and Pt 78.  I wore this manicure back in November, and by some miracle the clouds parted that Monday afternoon and I was able to get a few quick sunlight pictures...

Friday, November 22, 2013

Nfu-Oh #62 and China Glaze: Hello Gorgeous!

Swatch & Review


   Sunlight picture, yay!  I've already shared Nfu-Oh #62 before on my blog, but I've had these polishes for so long that my nails and photography skills have improved to the point that I really ought to reswatch them all!  Anyway, #62 is the linear holographic polish.  It takes 2 coats.

   China Glaze Hello Gorgeous! can be built up into a textured glitter polish because the soft pink glitter nicely hides any bare patches!  I used 3 coats by itself (no topcoat, no "underwear") for a look very similar to what I did with China Glaze Glistening Snow.  Next time I wear this I'll try it as a single-coat topper over a dark color.

Wednesday, August 28, 2013

My Picks From the L.A. Girl 3D Effects Holographic Collection

Swatch & Review

   I have several polishes to share today, princesses!  Prepare your eyes for a feast of sparkly goodness!  If you were a fan of the jelly-with-holographic-microshards beauties Aurora, Blaze and Storm that Zoya released you will like these, too!  I couldn't resist trying these new L.A. Girl polishes, and seeing how they compare...

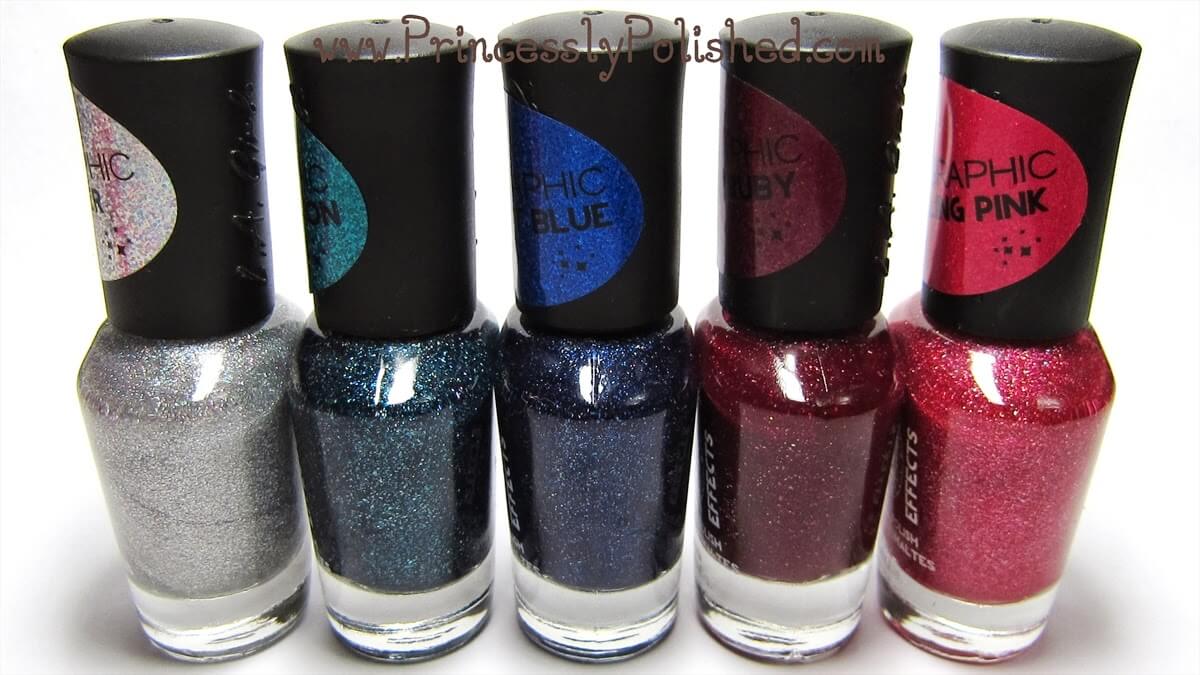
From left to right: L.A Girl 3D Silver, Teal Dimension, Brilliant Blue, Sparkle Ruby, and Dazzling Pink

   The 3D Effect collection has 3 more polishes that I did not pick up: Electric Coral (I'm not really a coral-wearing girl), Purple Effect (looks like an exact dupe of Zoya Aurora, which I already own), and Black Illusion (a dupe for Zoya Storm, again I already own that polish).  All of them include the same silver holographic microshard glitter in a jelly base, except for 3D Silver, which is a clear-based glitter.  On to the swatches!

Top to bottom: Teal Dimension, Brilliant Blue, Sparkle Ruby, Dazzling Pink


Teal Dimension 

   I used 2 coats, no topcoat.  This is a true, deep teal color.  It reminds me of jewels and peacock feathers!  The jelly coverage is fantastic while still being sheer enough to show off a lot of holographic sparkle.  Very beautiful and a great color for heading into fall and winter.


Brilliant Blue 

   I used 2 coats, no topcoat.  Deep sapphire blue.  It brings to mind the night sky or ocean depths.  Not normally a color I would grab but the finish and look of this is irresistible!  It should be perfect as a base for nail art or sponged into a galaxy manicure.  I think the darker jelly base gives an illusion of less or smaller pinpricks glitters.
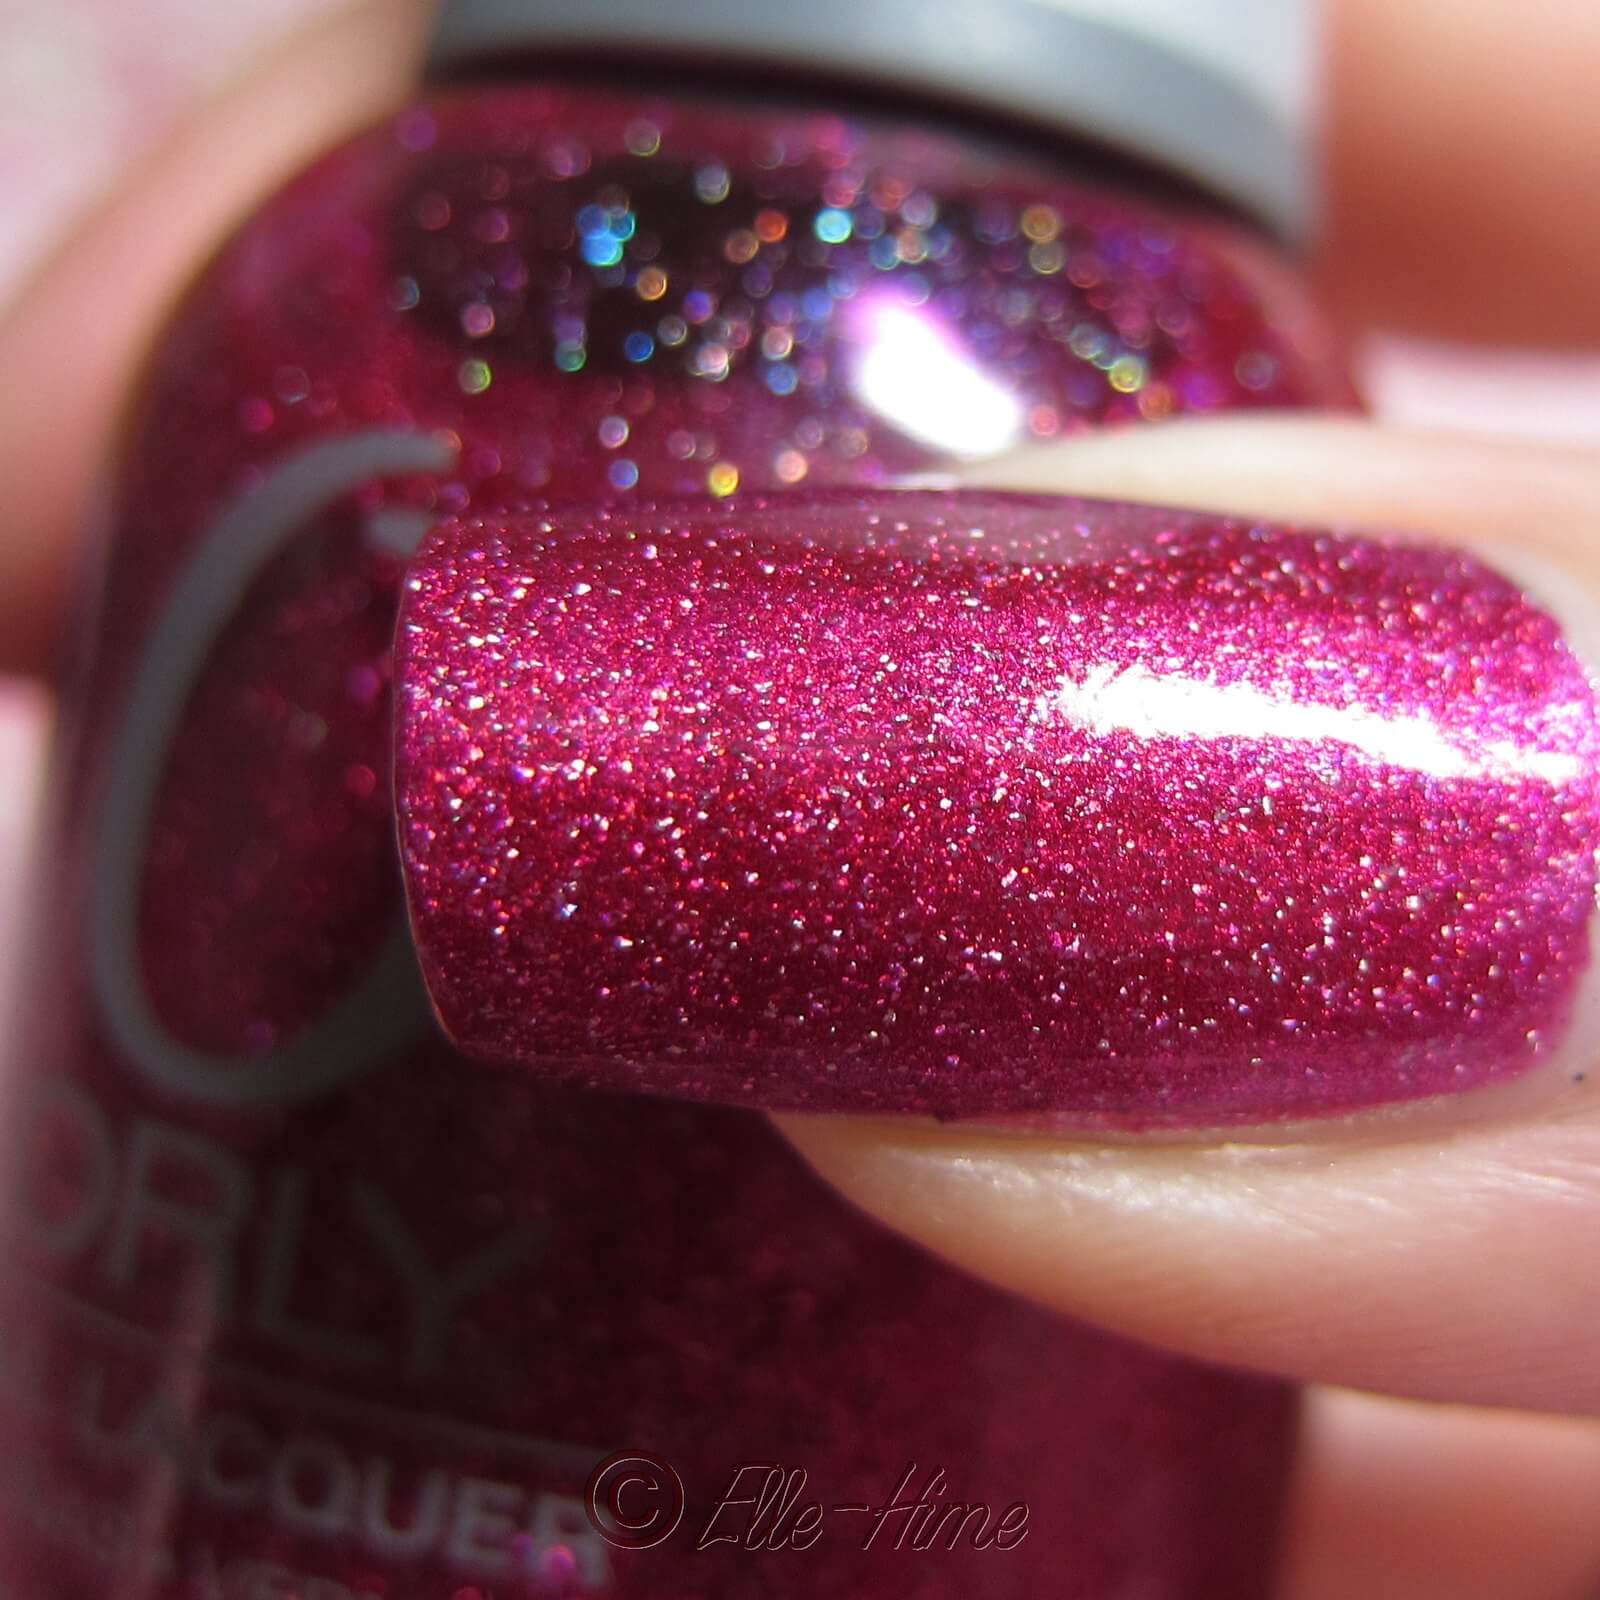


Sparkle Ruby 

   I used 2 coats, no topcoat.  Deep burgundy-red.  I absolutely love this color and was really surprised not to find any swatches of it while picking colors to buy from this collection!  The darker base makes it look less glitter-packed, but it sparkles beautifully.  And yes, Sparkle Ruby seems to be an exact dupe for Zoya Blaze!


Dazzling Pink 

   I used 2 coats, no topcoat.  Fun, flamingo-ish, warm toned pink.  This color was the most sheer and could probably use 3 coats.  It really shows the glitter!  I was on the fence about ordering this color because I'm picky about pinks, and sadly I don't think this one is the right shade for me.


L.A. Girl 3D Silver, 2 coats alone and 1 coat over black
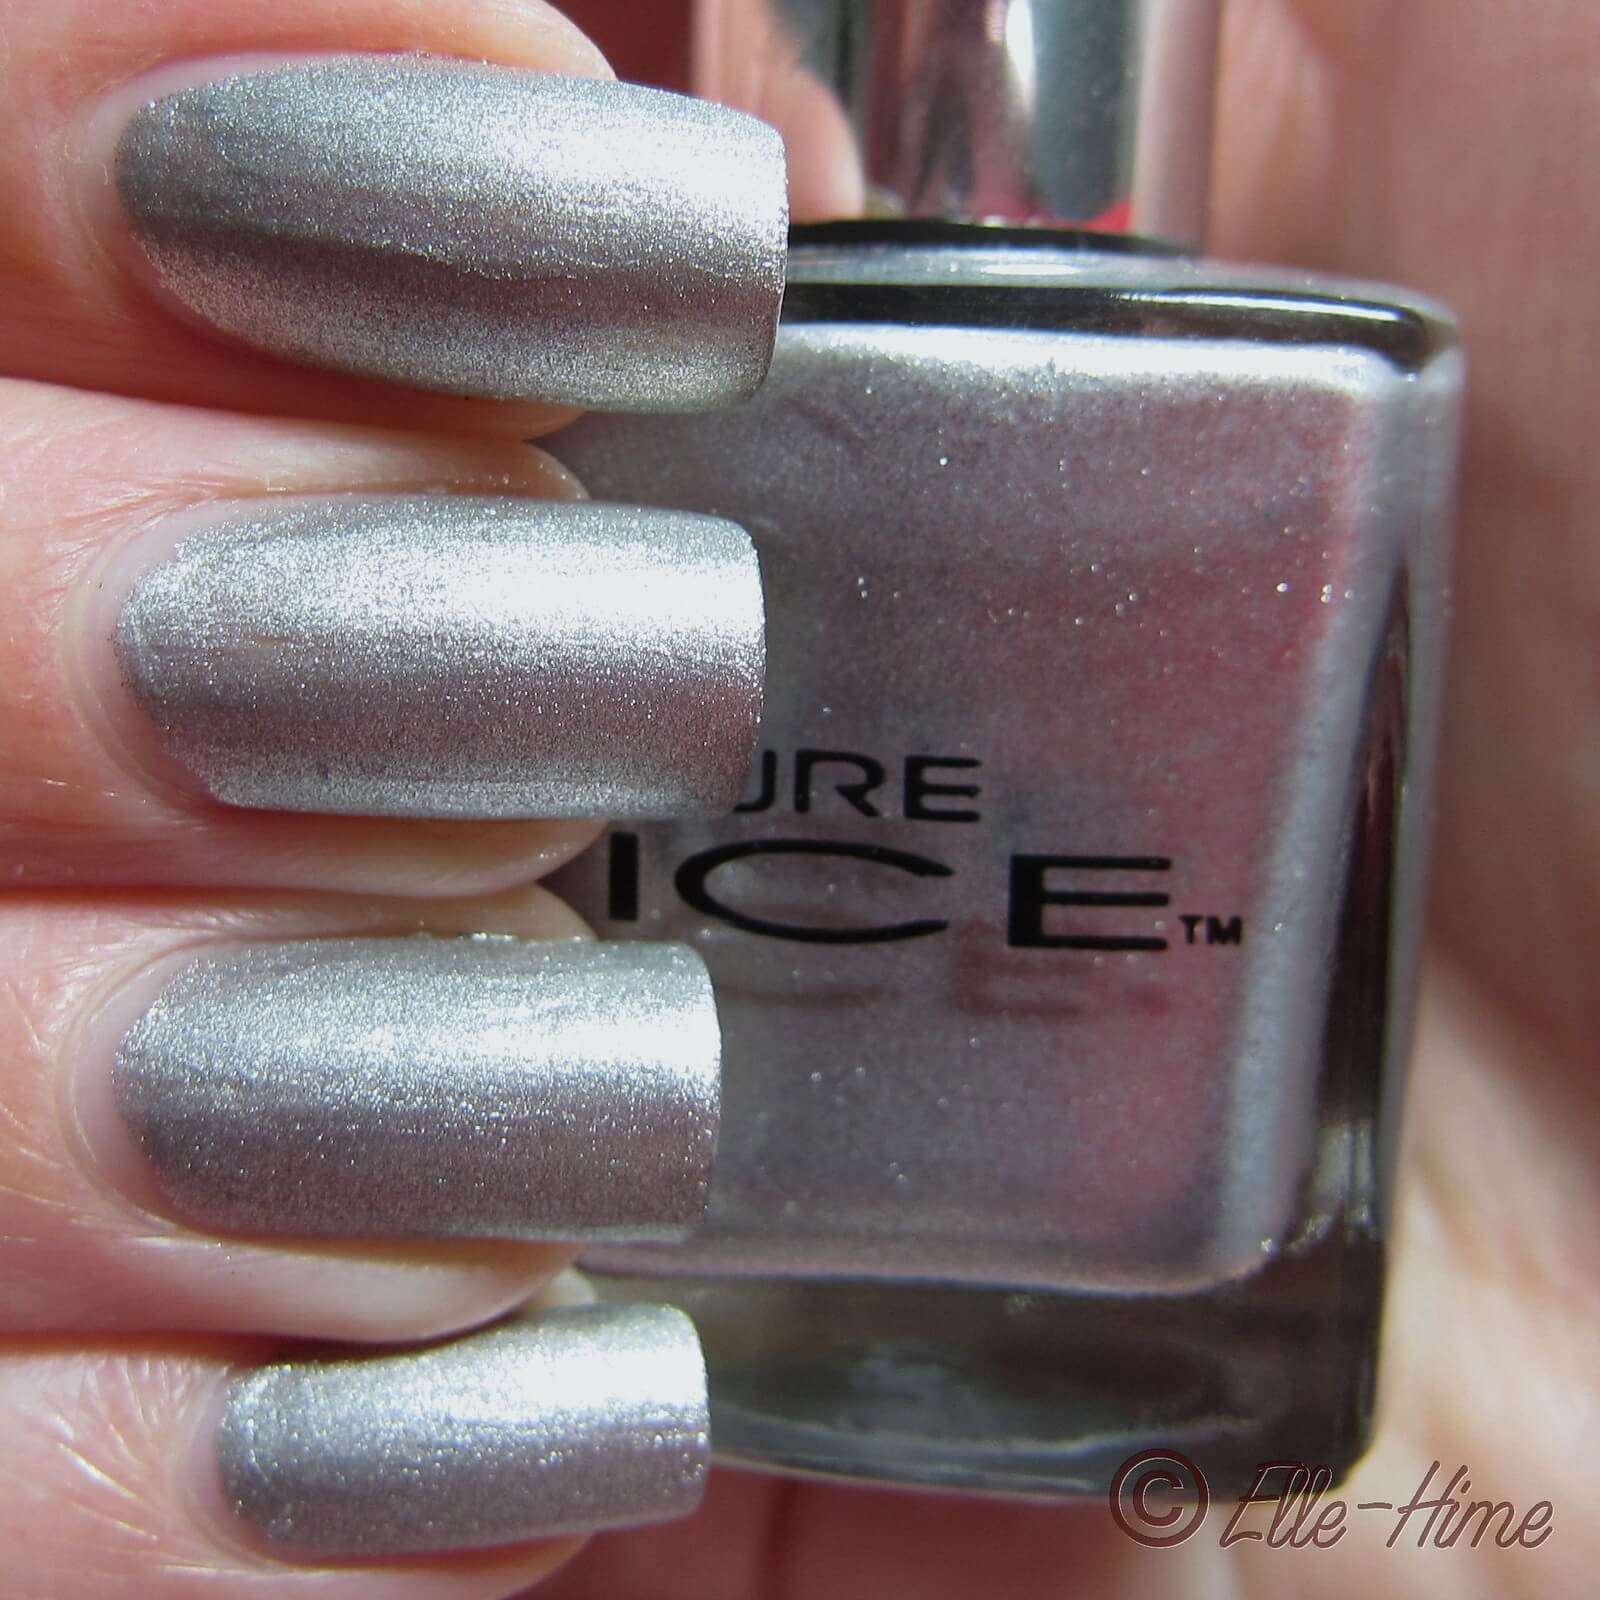

3D Silver 

  Again, no topcoat used.  If you love the glitter but don't like any of the colors in this collection, this would be the polish to get.  It isn't going to have quite the same depth as the jelly-based colors, but it layers over any color to create an effect that looks the same from arm's-length away.  This is definitely a topper, I imagine it would take 5 coats to try to get the glitter opaque by itself.

   I'm going to talk about formula now because these all had the same formula!  In most reviews I found the swatcher said the polishes were thick, but that was not the case for me.  They aren't thin and runny, but they are very easy to use.  I didn't have any issues with pooling, dragging, or glitter being uneven.  Also, they dried fast.  I didn't use topcoat because they dried to a perfectly smooth, glassy finish all on their own.  Durability was good; I only had minor tip wear after a full workday.  Removal was a breeze, as well.  In my opinion these are all real winners.

   As for the glitter particles themselves, they are fantastic.  The fact that they are tiny irregular shapes makes the polishes interesting and unique.  The rainbow sparkle is hard to capture in photographs, so please believe me when I say it is there!  And in some lighting these polishes give a very faint linear holographic effect.  Otherwise I would classify these as scattered holo nail polishes.


   While this collection may not be L.A. Girl's most original batch of creations, it worth noticing.  If you were left wanting more by Zoya's holographic jellies last year, take a look at these.  (Don't bother buying repeats of the identical colors, though.)  If you like delicate sparkly toppers, pick up 3D Silver.  If you like solid-performing polishes that can be found for $5 a bottle or less, definitely hunt these down!  Here is the official webpage for this 8-polish collection.  I hope you found my swatches helpful.  =)

Monday, August 19, 2013

Color Club: Miss Bliss & Eternal Beauty with Cloud Art

Swatch & Review / Nail Art

   First off, huge shout-out to my husband for replacing the inverter board in my laptop.  Now the backlight in my screen lights up again, so I can edit my pictures!  Yayyy...  The timing of that part dying last week was really bad - August 15th was my 2-year blogaversary, and I was too busy to bother trying to make a post on a different computer, or more aptly, a different screen.  (I don't want to edit colors on a screen I'm not used to.)  Anyway, happy belated blogaversary to me - celebrations shall ensue. =)


   Photographs don't do this manicure justice.  I did a little cloud design and it hardly showed in pictures...  I used Color Club Miss Bliss (pink linear holo) and Color Club Eternal Beauty (purple linear holo).  Miss Bliss is a slightly deeper shade of pink than Color Club Halo-graphic, because I love linear holos and the color pink I'm happy to have both in my collection!    But they are quite similar and you really don't need both...

   Anyhow, I can rave about the formulas on these polishes equally.  They were super-smooth to apply and very pigmented - wearable at 1 coat!  I used 2 coats for better depth of color, however.  Miss Bliss is a true pink color, and Eternal Beauty is true purple, not leaning too blue or red.  And they are so full of rainbows.  Simply awesome.  Check out my picture below from before I added the nail art!


   Two more untrieds have become tried and loveds!  What do you think of them?

Thursday, August 8, 2013

Color Club: Beyond and Harp On It with Tape Lightning Bolt Nail Art

Nail Art / Swatch & Review

   I was about to swatch Color Club Beyond when I realized that I never shared Harp On It on my blog, and realized they would pair very well.  Here they are swatched together, with a bit of nail art!


   I'm wearing these polishes without any base or top coat, so you can see how they have a smooth finish and nice shine all on their own.  Harp On It is Color Club's silver linear holographic polish from their first Halo Hues collection.  It took 2 coats for opacity, but the formula is very good.  So long as you keep your brush movements gentle and wait a little while in between coats you won't have any issues with dragging.  Beyond, the linear black holo, is fantastic.  I can't say enough good things about this polish!  I only needed 1 coat and it was totally opaque!  The formula is super-smooth and the rainbow effect is very strong.  I definitely recommend this polish if you're hunting for the ever-elusive perfect black holo, and don't want to spend a fortune.

   The lightning bolt accent nail makes me feel like my nails should be super-powered, haha.  My husband liked it and it was really easy to do!  All you need is a bit of tape and a pair of scissors.  First, start with your completely-dry base color.  This is important, otherwise your polish could be pulled off by your tape.


   Cut a zigzag into a piece of tape and place each piece on your nail to create your desired bolt shape.  Make sure the edges are smoothed down so no polish will seep under.  I'm using painter's tape.


   Paint the open area, and quickly but gently peel the tape off before your polish dries.  That's it!  Enjoy your snazzy nail design!


Friday, July 26, 2013

Different Dimension: Aorta Miss You But I Don't

Swatch & Review


   I was sorting through my Indie polishes when I came across a special bottle that I used but never got around to sharing on my blog - shame on me!  Released at the start of 2013, this is Different Dimension Aorta Miss You But I Don't.  The name makes me giggle, and I'm the one who named it!  This lovely blend of glitters was all Missi's doing, though.  So I feel honored that she thought the name was fitting for it!

   For this quickie swatch I layered one coat of Aorta Miss You But I Don't over Zoya Purity, any I love how it pops on the white base!  There are all sort of pretty glitters floating in a clear base.  The name-inspiring purple hearts, of course, but also magenta circles and larger holographic hexes in pink and red.  What really does it for me is all the pretty microglitter, though!  There is magenta, silver, and even lavender, and it looks sooo lovely together!

   I'm a huge fan of Missi's Different Dimension polish formula.  I ended up wearing this for a couple of days without topcoat. Despite the larger glitters it dries quite smooth; my nails weren't snaggy at all.  A couple larger glitters chipped off but that heart stayed on!  Really impressive all around.  Different Dimension polishes are available on Etsy.  =)

Saturday, July 13, 2013

I♥NP: Once Upon A Starry Night over Pure Ice: Fairy Godmother

Swatch & Review / NotD

   Good evening, princesses!  Here is a manicure that is sure to give you sweet dreams about polish.  ;P  I was fortunate enough to snag Once Upon A Starry Night during I♥NP's clearance sale, and found the limited edition Pure Ice color Fairy Godmother, which pairs wonderfully as a base color.  Also, I think I may have found my "pose" for pictures.  Holding my hand at an angle seems most comfortable.


   I used one coat of I♥NP (I Love Nail Polish - what a great brand name!) of Once Upon A Starry Night, which is a clear-based glitter with a really nice density for using as a topcoat.  The glitters in it are prismatic, silver, blue, and matte white.  It contains holographic silver stars but not very many of them.  Getting one of the stars is a treat, and the nails without stars don't look like they are lacking.  I've had this polish on my wishlist since I first saw it announced last year!  Sadly this shade is now discontinued - sorry!

   ILNP definitely earns their tagline of "boutique nail lacquer": the super cute packaging, the wonderful brush and good formula...  I'm not sure if this bottle is made with the original or reformulated glitter base.  (The suspension base was changed after complaints that the polishes were great but smelled horrible.)  I can say that this does have a polish smell but it is not at all offensive!


   Pure Ice Fairy Godmother is a perfect amethyst shade that will. not. photograph. accurately.  I tried color-correcting the photos and gave up, because by the time the polish was looking right my hands looked fiery.  Yes, this is a cool-toned purple, but it is more red than this.  It's a medium type of purple that isn't too bright, too dark, too pastel or dusty.  It also seems to have a faint hidden shimmer.  I used two coats, and coverage was very good.  The formula is on the slightly thick side.


   These are two really pretty polishes that work great together!  Pure Ice is sold at Walmart, and you can find I♥NP shades at their website:

Monday, July 8, 2013

Holographic Gem Blossoms Manicure

Nail Art / Swatch & Review

   I'm wearing an extremely princess-y manicure today!  I did these nails Saturday after deciding I wanted something holographic and was inspired by some pretty glitter gradients on other blogs.  Then I realized that all the polishes I used were essentially untrieds - swatched but never used in a manicure.  So I'll be talking a bit about them, too.


   So pink, so girly, so great!  For as much as I love pink I don't do pink nails that often.  I have a hard time finding the right pinks for my skintone.  These are the polishes I used:

Color Club Halo-graphic, Milani Pink Flare, Nyx Girls Dynamic Glitter and Salon Perfect Silver Sparkler.

   First let's talk about Color Club Halo-graphic.  How did I let this go for so long without doing a proper manicure with it?  From the 2012 Halo Hues collection, this pink is gorgeous in the bottle and cool-toned enough that I find it wearable.  I used two coats on my thumbs, index and pinky fingers, then my regular Poshe topcoat.  Once the manicure is totally dry the holographic effect comes back 100%.  Application is good for a holographic polish, but isn't very self-leveling.


   Milani Pink Flare is part of the One Coat Glitter line, but it is most certainly not opaque in one coat.  My right hand, pictured above, shows this polish at one coat on my ring finger and at two on my middle finger.  Both have one coat of Halo-graphic as a base/underwear color.  I must say I love this glitter, it is the perfect combination of soft and sparkly.  Different from my expectations but I don't like it any less.

   The photos below show my left hand.  I had the good sense to wrap my tips with Halo-graphic before putting on a coat of Pink Flare, so the sheerness isn't noticeable unless you're really looking.  My middle finger (three flower-shape paillettes) is wearing 4 coats of Milani Pink Flare, and if you look closely you can still see some VNL.  As soon as I saw how sheer it was I put a base coat of Color Club Halo-Graphic down on my ring finger, and only used two coats of Pink Flare.


   For the gradients I used a combination of Nyx Dynamic Glitter and Salon Perfect Silver Sparkler.  I started off by dabbing Dynamic glitter at the cuticles and then placed individual glitters from Silver Sparkler to fill in spaces that needed it.  I also used loose flower paillettes to enhance the gradient nails.  These nails would have had a lot of texture so I used extra topcoat until they were smooth and super glossy!


   The only negative thing about this manicure is that it is SO sparkly that it is hard to photograph!  There is so much glitz that my camera seems to be at a loss about which nail to focus on.  Of course, that quality is also what makes it so fantastic.  I'm really enjoying this glittery, rainbow-filled manicure!  =)

Monday, February 11, 2013

Different Dimension: All Red-y In Love Glitter Gradient

Nail Art / Review


   This was actually a practice session that I felt turned out well enough to share.  I love glitter gradient nail art, but I'm not very good at doing them!  In particular the gradients that start at the cuticle and fade out.  Different Dimension All Red-y In Love is packed with glitter and easy to work with, so I think I did okay this time!  My base was two coats of China Glaze Frosty, a pretty white shimmer that is quite sheer.


   This macro shot of All Red-y In Love shows off the glitter, but none of my pictures is showing just how extremely sparkly it is!  A mix of red, pink, and silver holo glitters, including a dash of holographic red hearts.  I had left my bottle upside-down overnight before using it and had no trouble getting to the hearts that way.

   All Red-y In Love is one of the nail polishes I named!   If you'd like a bottle you can find it in the Different Dimension etsy shop.  =)

Tuesday, January 29, 2013

Different Dimension: Vervain

Swatch & Review


   Today I'm sharing another polish that Missi from Different Dimension sent me for review: Vervain.  I didn't actually name this one, but it reminded me of the same flower that she did name it after!  I was browsing the Internet looking at flowers for spring time polish name inspiration when I saw this picture:

Image source: BHG

   Verbena and vervain flowers come is several colors, but I think this white and purple type is the prettiest.  Let's take a look at a bottle shot of this polish!


   It contains small purple holographic hexes and large purple hexes.  The large size glitters are more sparse and you won't end up with as many on your nails as they appear in the bottle, but they are there.  Most of mine ended up buried in the layers of polish.  The milky white base is hiding a very beautiful purple micro-fleck shimmer.  This likes to hide and I couldn't see it on the nail at all, but if you enlarge this bottle shot you can see it in about the middle-right area.


   I wore 4 coats of Vervain for these swatches.  The formula was a bit more tricky that usual for Differnent Dimension.  It was also sheer and that is what it took to get rid of my VNL, but if you're okay with some VNL it was looking good at 3 coats.  If you're totally obsessive over opaque nails or "saving" on your glitter polish you could layer 1-2 coats over white.  That would (probably) still end up being 4 coats of polish, though.  I really like the depth of all the glitter.  I just wish you could see the pretty shimmer!  I have a hunch that you could layer it over another color to get that shimmer to be seen - any suggestions?

   As always Different Dimension polishes are available on etsy!

Monday, January 7, 2013

Orly: Miss Conduct & Pure Ice: Ruffled Sheets

Swatch / NotD

   This is a simple manicure but I really like it.  When I did my Blue Midnight jewelry nail art I ended up painting my left hand in Pure Ice Ruffled Sheets.  I love silver polish but it was feeling washed out with my other hand being so colorful and fancy.  Here is Ruffled Sheets on it's own at two coats, with no top coat.  As you can see it dries shimmery-matte.  (You can enter to win a bottle, along with two more shades!)


   A very nice type of brushed-steel metallic and it stands out as unique in my collection of silvers.  My eyes kept wandering to my new bottle of Orly Miss Conduct, though.  I considered taking Ruffled Sheets off and redoing my nails with the Orly, but instead I layered it.  This way I only needed one coat of Miss Conduct, which has a jelly-type base that let the metallic of Ruffled Sheets shine through.  It was hard to capture the effect...


   Miss Conduct dries shiny and with Poshe topcoat added my nails turned into little glass jewels.  The glitter is fantastic: holographic microshards such as found in the Milani 3D polishes and Zoya Aurora and Storm.  It helped bring out the Ruffled Sheets accent nail made shiny with topcoat.  Miss Conduct is now among my favorite pink polishes because of the awesome color and perfect formula.  Ruffled Sheets has proven itself to be good for nail art and good for layering.  So, I'd call this left-hand-mani a success!

Friday, January 4, 2013

Butter London: Knackered over Wet 'n Wild: Black Creme

Swatch / NotD

   It took me way too long to get around to wearing this polish after nabbing it from a blog sale.  Butter LONDON Knackered had been on my wishlist for awhile, though I had no idea what the name meant.  It prompted me to look into British slang, and in that way I found that it means basically means exhausted.  Cool!  British slang is fun!  And so is this polish.


   I have to admit that I was knackered when I did my nails.  I used one coat of Wet 'n Wild Black Creme as my base (yes, it really is good - my first time trying it), and one coat of Knackered over top.  I didn't do my best work with this manicure, and I didn't realize how sloppy it was until it showed in the macro shots... yikes!


   Butter LONDON Knackered has a thin consistency that dries pretty fast.  I think it would have looked better with either two coats or a thicker, better-applied coat.  Even so this polish is super gorgeous, looking the most stunning in low light when it's holo microglitter sparkles like crazy and it has more of a blackened smoldering effect.


   The purple-to-green shift this polish has is awesome.  It also shows pale blue in the bottle but I don't really see that on the nail.  I believe that is just from the sheer tint of the polish.  If I use Knackered alone it would look more grey-blue, and not have such a strong color shift.


  The sparkle reminds me of China Glaze Fairy Dust very much.  I expect you could create a similar manicure just by layering Fairy Dust over your favorite duochrome polish.  I loved wearing Knackered so now I'm inspired to create other versions of this manicure through layering.  What do you think of it?